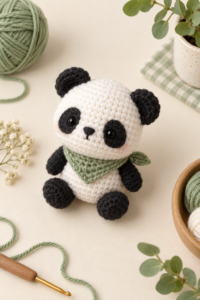
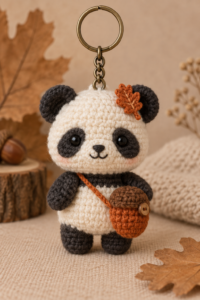
How to Crochet an Autumn Panda Keychain with an Acorn Pouch

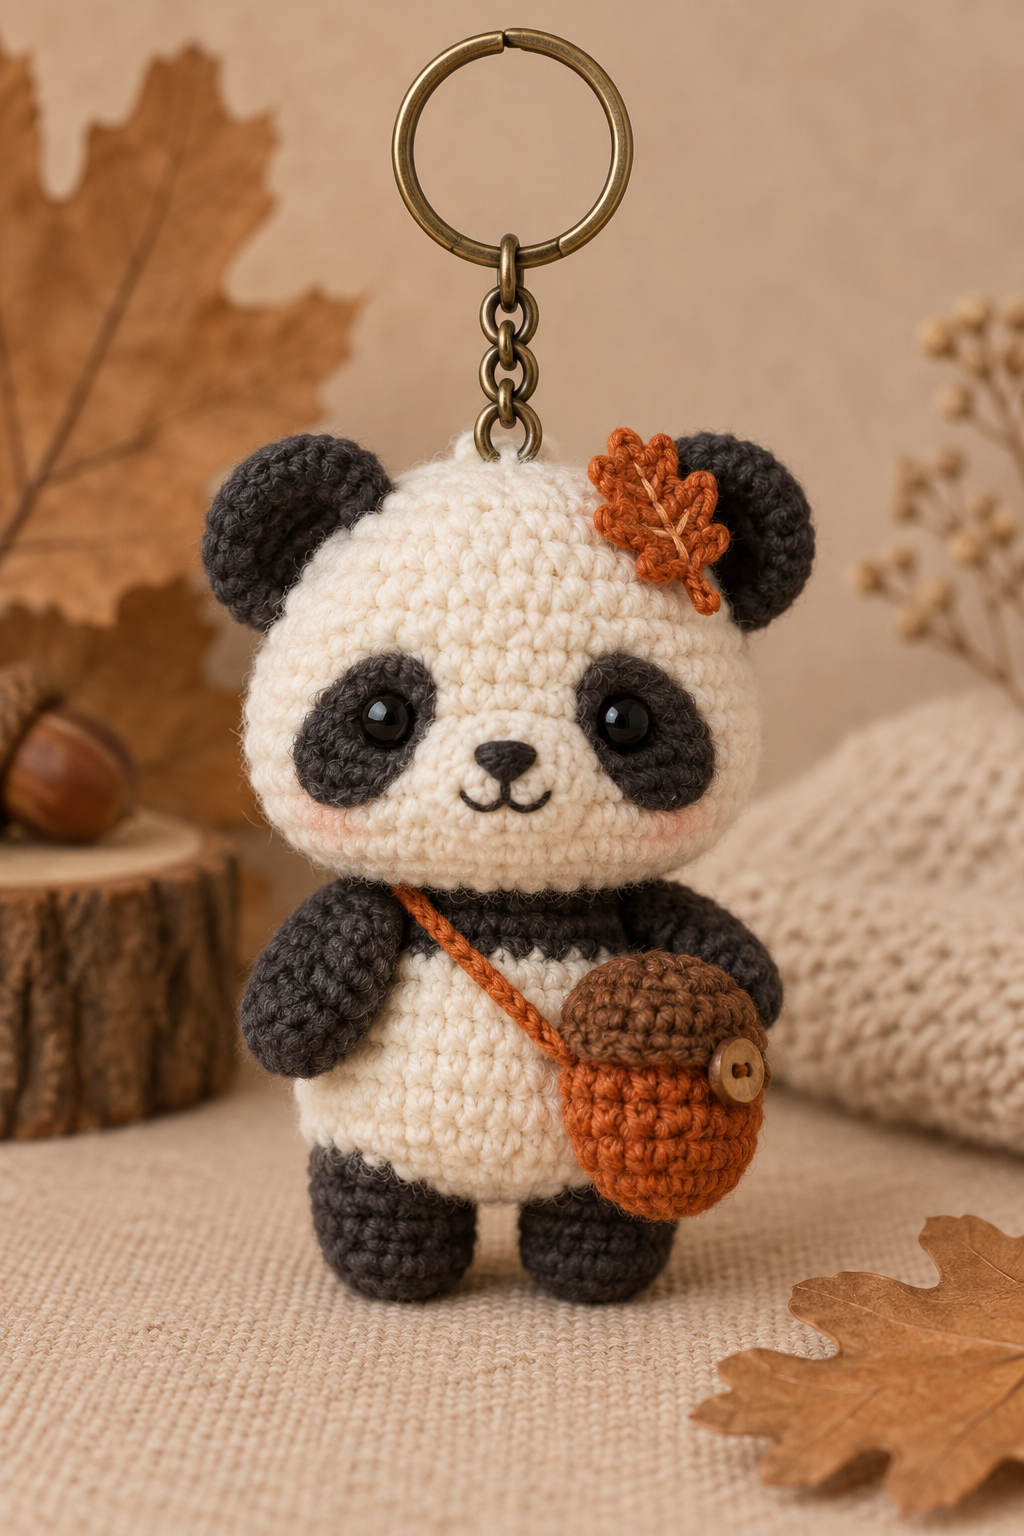
November is a good moment for small handmade gifts and warm woodland details. This original Autumn Panda keychain combines a compact amigurumi panda, a tiny acorn pouch, a rust-coloured leaf, and a secure keyring loop. It is a confident-beginner project designed to teach round counting, marker-led placement, balanced assembly, and durable finishing.
The finished panda is about 3.25 in / 8 cm tall before the ring. Your goal is not to match a photo perfectly: make dense fabric, place paired parts symmetrically, and test the finishing loop before trimming any yarn. Save this lesson before you begin; it includes visual checkpoints for the decisions that normally cause trouble.
Quick facts
- Skill level: confident beginner
- Terms: US crochet terminology
- Construction: head, body, limbs, ears, patches, pouch, then finishing
- Finished size: about 3.25 in / 8 cm tall
- Key techniques: magic ring, sc, invisible decrease, markers, sewing, and hardware finishing
Why this suits November
Warm woodland colours, leaves and acorns suit autumn decor, while a small completed keychain works well as a handmade gift later in the month. This is an editorial seasonal angle, not an invented claim about search volume: no fresh Pinclick data was supplied. The pattern and all visuals below are original.
Materials
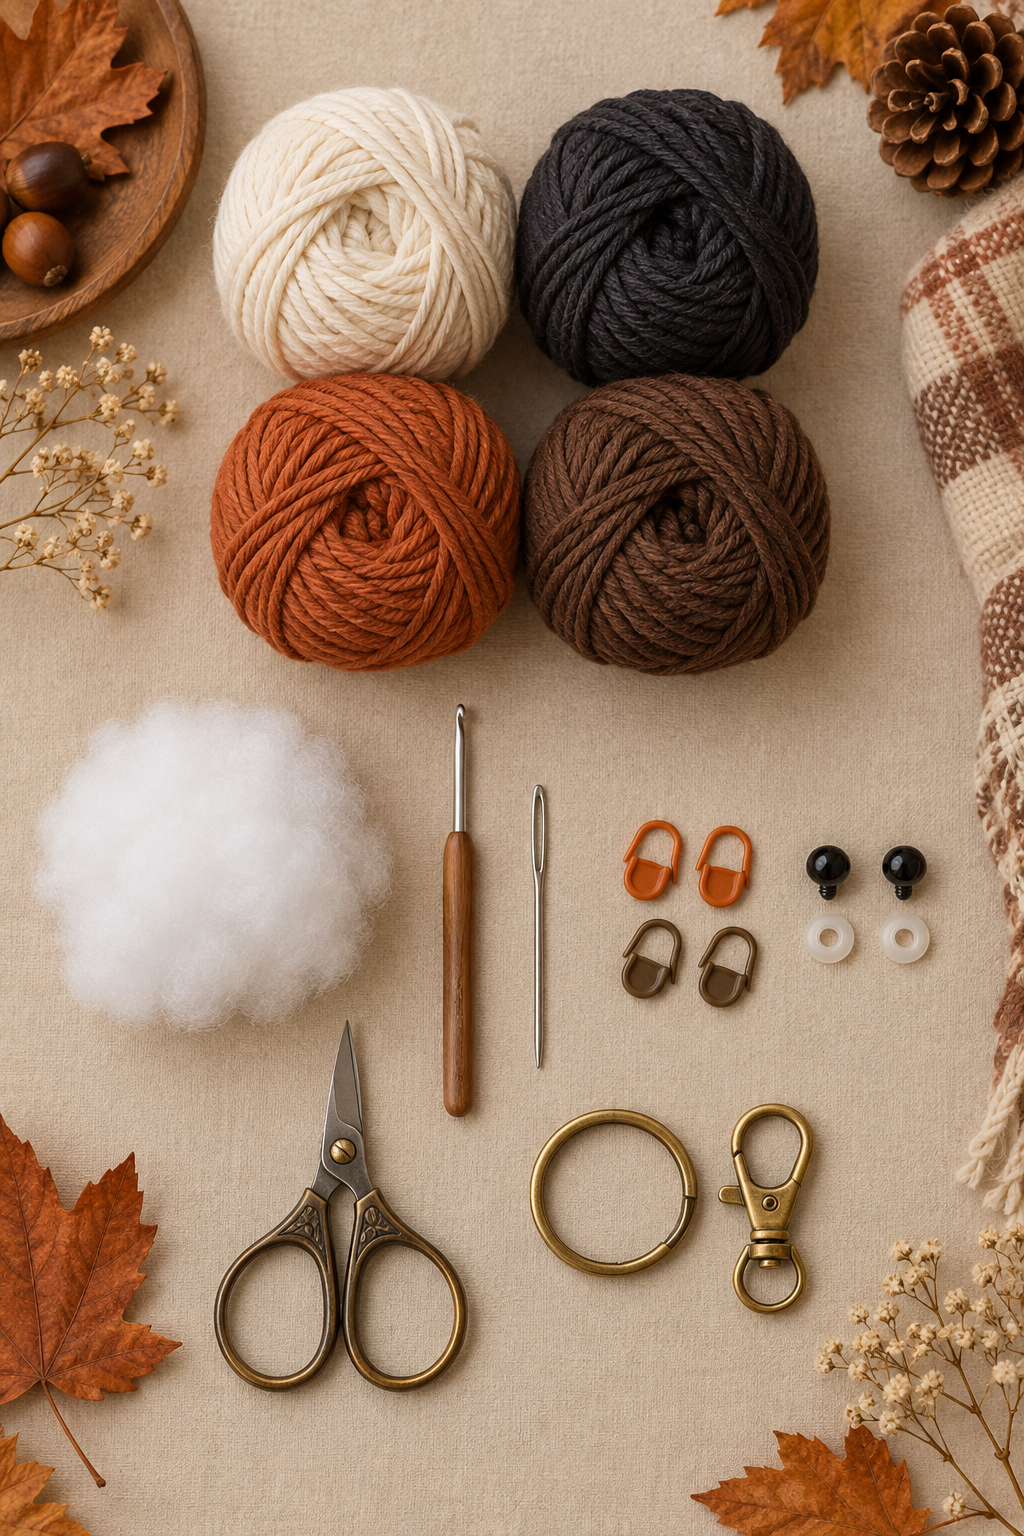
- Sport or DK cotton yarn in ivory, charcoal, rust orange and cocoa brown
- 2.5–2.75 mm hook
- Small amount of toy stuffing
- Two 6 mm safety eyes or black embroidery yarn
- Yarn needle, scissors, two removable markers and pins
- Small keyring or lobster clasp
Safety: keyring hardware and safety eyes are not for babies. For a young child, embroider eyes and omit the hardware.
Abbreviations
- MR = magic ring
- sc = single crochet
- inc = 2 sc in the same stitch
- dec = invisible decrease
- sl st = slip stitch
- ch = chain
Three checkpoints before assembly
- Head: its widest round has 30 stitches. After two straight rounds, it should become a shallow cup.
- Body: its widest round has 24 stitches. Mark both leg positions before decreasing, so they are level.
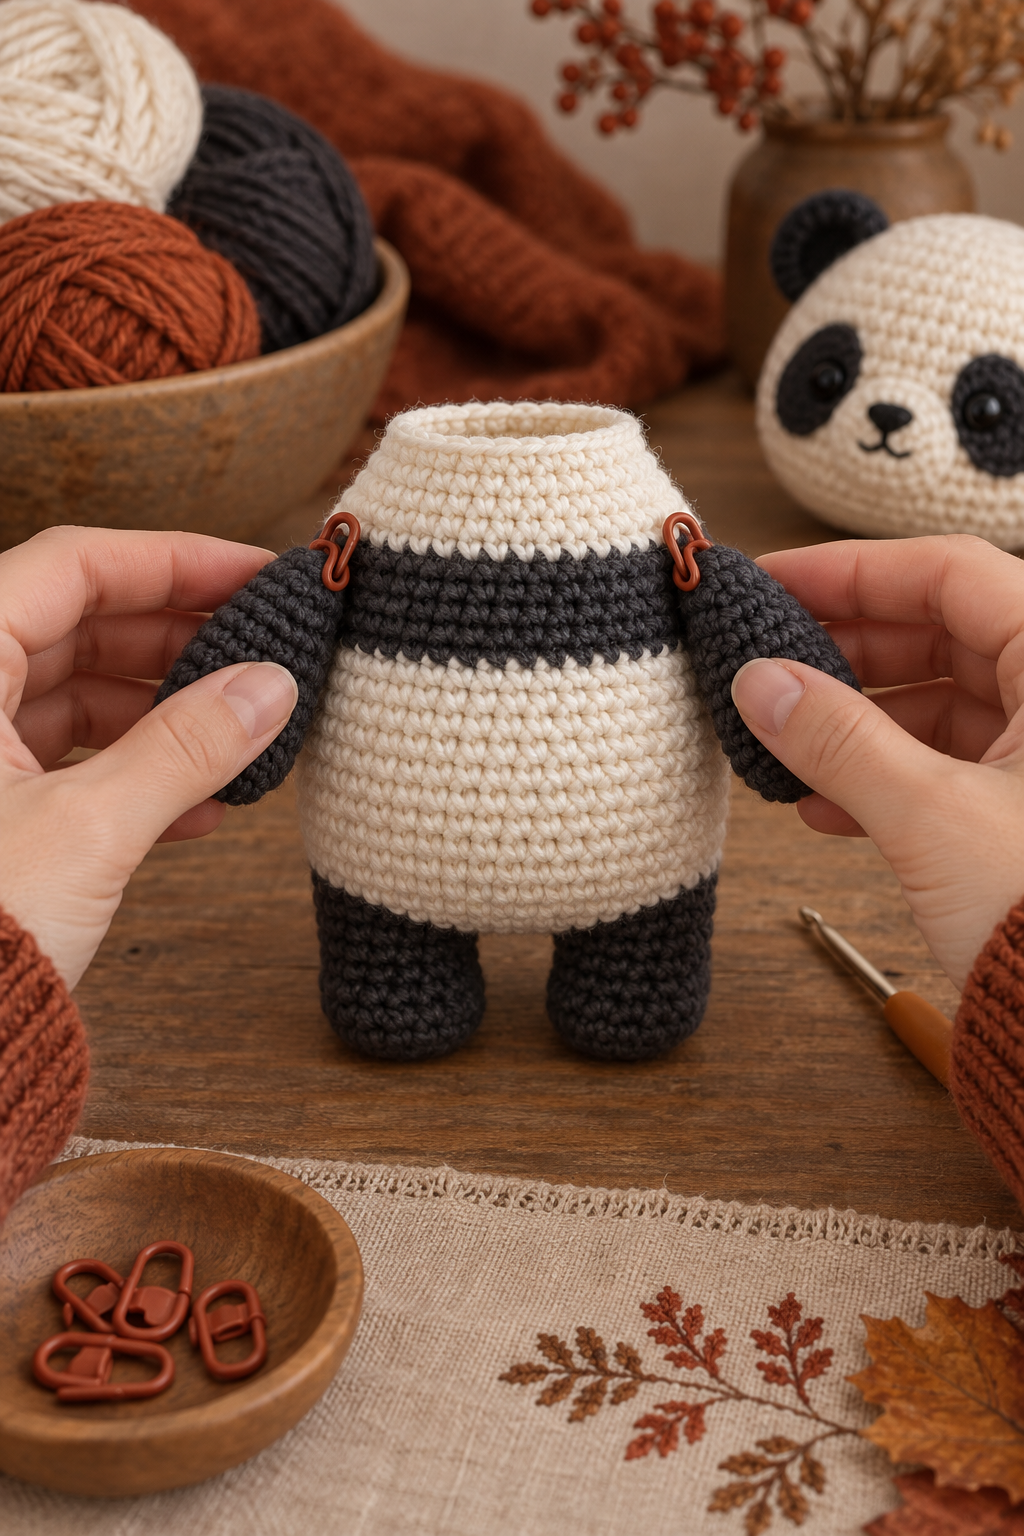
- Pairs: pin all matching pieces first. View the panda from the front and above, then sew only when the placement mirrors.
Part 1: Ivory head
Work in continuous spirals and move the marker into the first stitch of each round. R1: 6 sc in MR (6). R2: inc around (12). R3: (sc, inc) × 6 (18). R4: (2 sc, inc) × 6 (24). R5: (3 sc, inc) × 6 (30). R6–7: sc around (30). The circle must now turn upward; if it stays flat, confirm that you did not accidentally add increases.
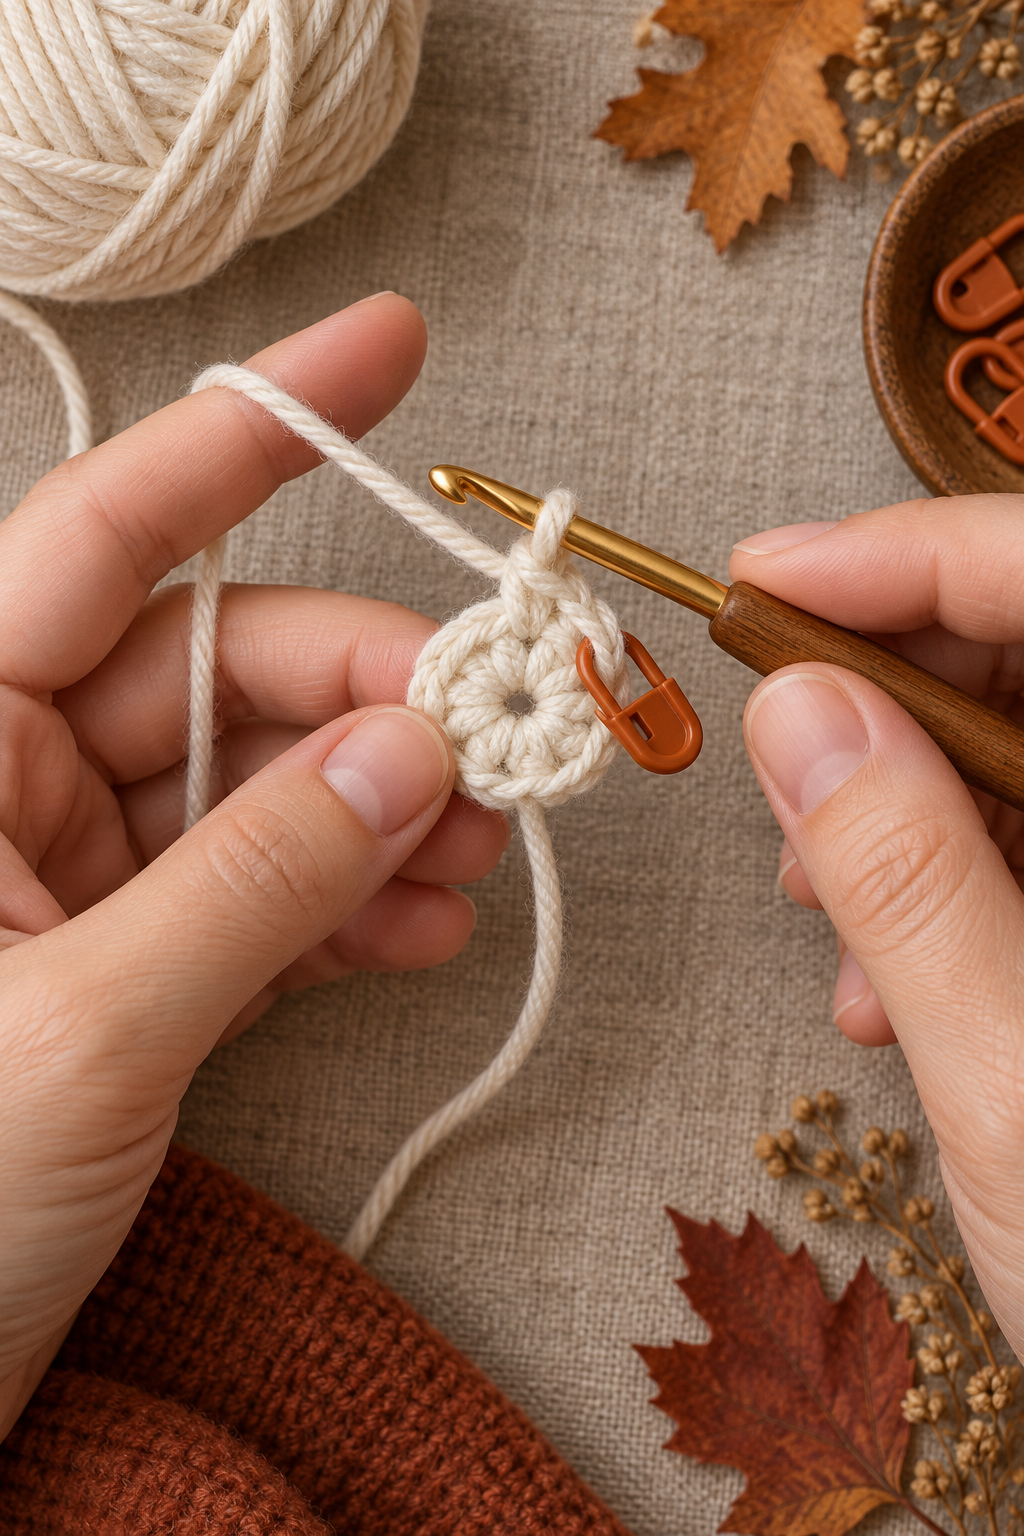
R8: (3 sc, dec) × 6 (24). R9: (2 sc, dec) × 6 (18). Add stuffing around the edge, not as a hard centre ball. R10: (sc, dec) × 6 (12). R11: dec × 6 (6). Add the final pinch of stuffing, thread the tail through the front loops, pull closed, and weave it inside.
Part 2: Ivory body and measured leg placement
R1: 6 sc in MR (6). R2: inc around (12). R3: (sc, inc) × 6 (18). R4: (2 sc, inc) × 6 (24). R5–6: sc around (24). At Round 6, place a marker at each side, using the back marker line as your centre. From the front the two markers must sit on the same level.
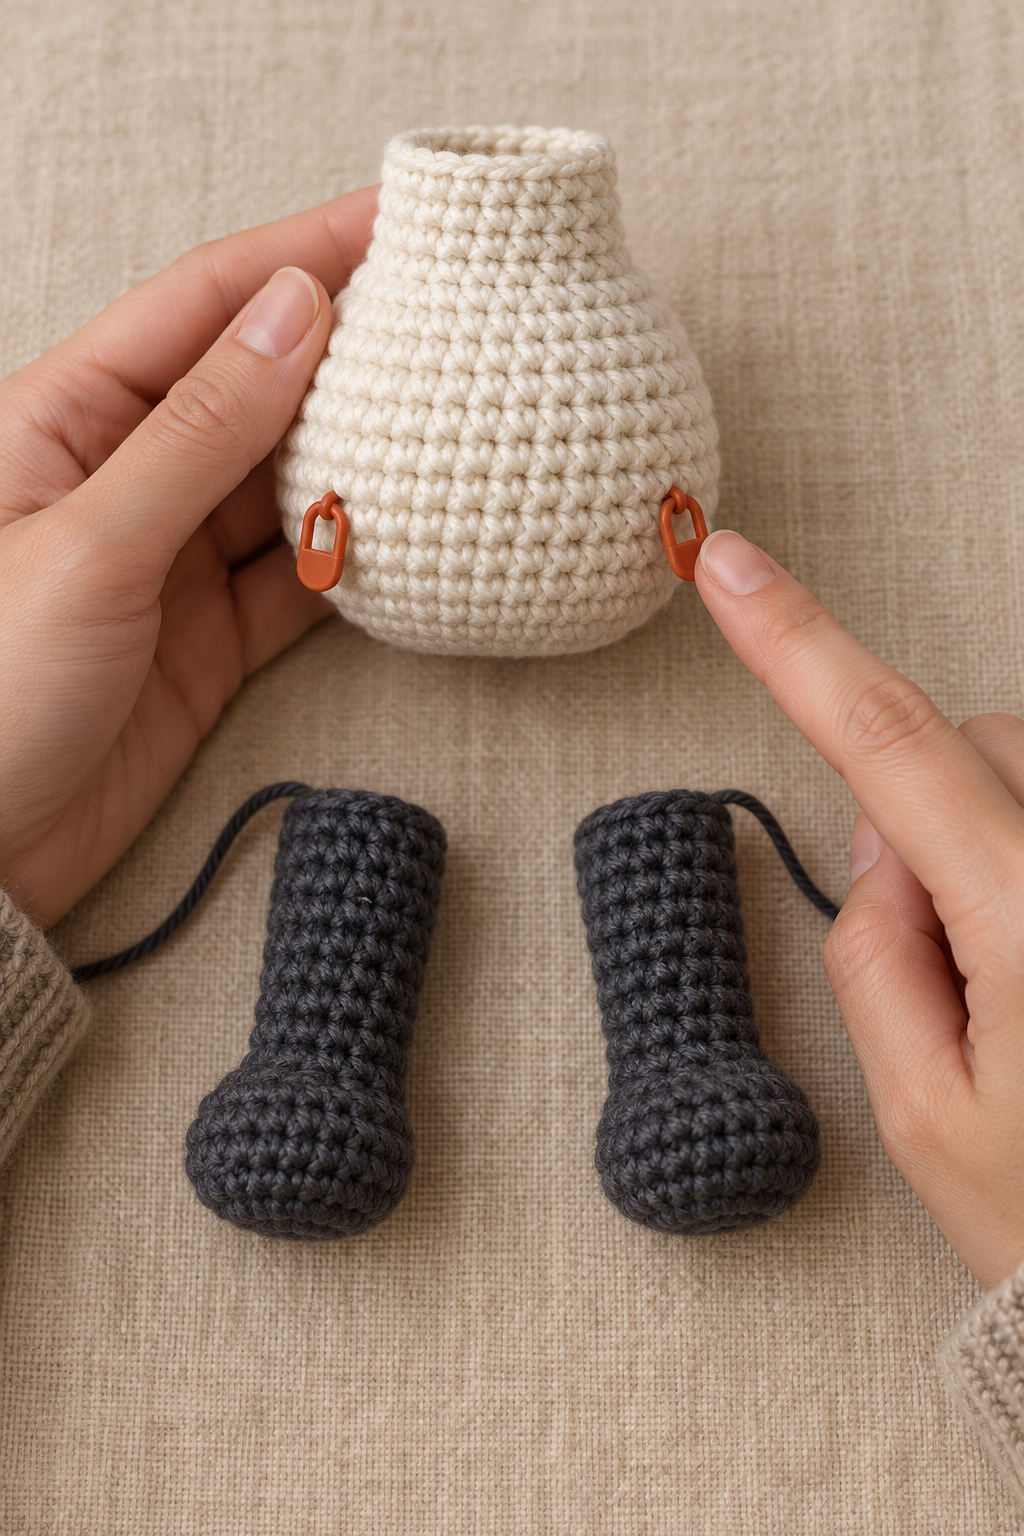
R7: (2 sc, dec) × 6 (18). R8: sc around (18). R9: (sc, dec) × 6 (12). Stuff the body, leaving its upper edge flexible. R10: dec × 6 (6). Close the opening but keep a long tail for the head join.
Part 3: Charcoal legs, arms and ears
Legs, make 2: R1: 6 sc in MR. R2: inc around (12). R3–4: sc around. R5: (sc, dec) × 4 (8). R6–7: sc around. Lightly stuff only the feet. Place each leg at a marker with the foot facing slightly forward; sew around the upper rim, then add an extra anchoring stitch at the inner edge.
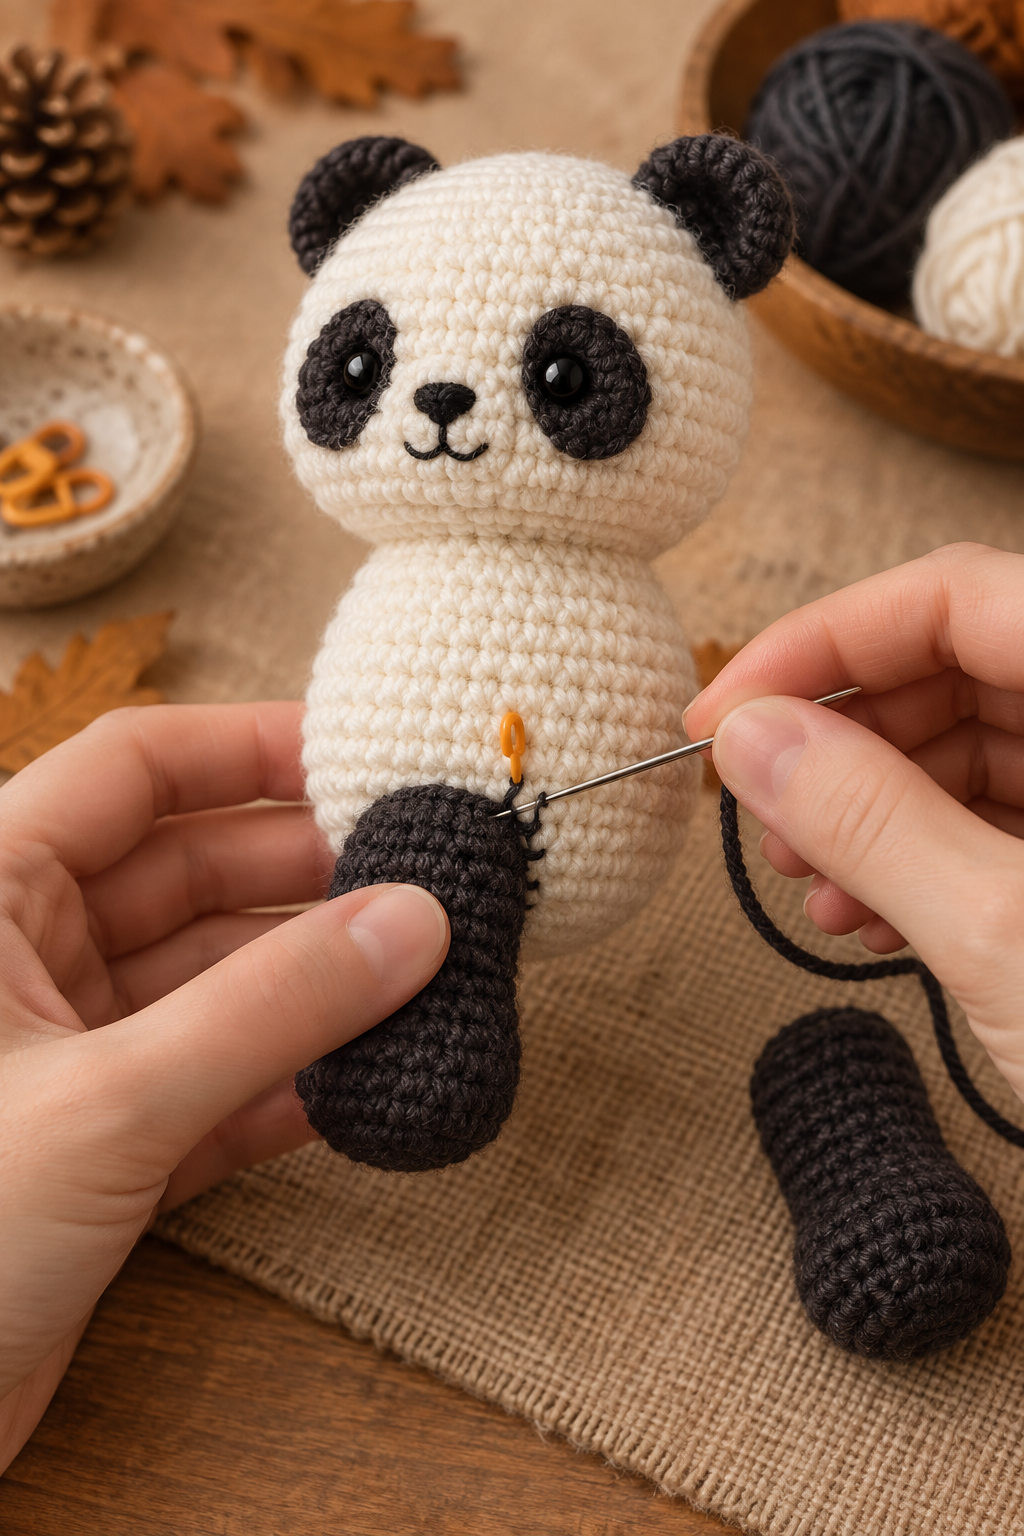
Arms, make 2: R1: 6 sc in MR. R2–4: sc around. Do not overstuff. Pin them one round below the head join with their top edges level; sew only after comparing both sides.
Ears, make 2: R1: 6 sc in MR. R2: inc around (12). R3: sc around. Flatten gently and retain a long sewing tail.
Part 4: Face, ears and leaf accent
Eye patches, make 2: R1: 6 sc in MR. R2: inc around (12). R3: 5 sc, ch 1, turn, 4 sc, then fasten off. Pin them so the inner edges leave a narrow ivory gap and the top edges sit on the same round. Sew the patches, then embroider a tiny triangle nose and short mouth. If safety eyes are used, install them securely before the head is closed.
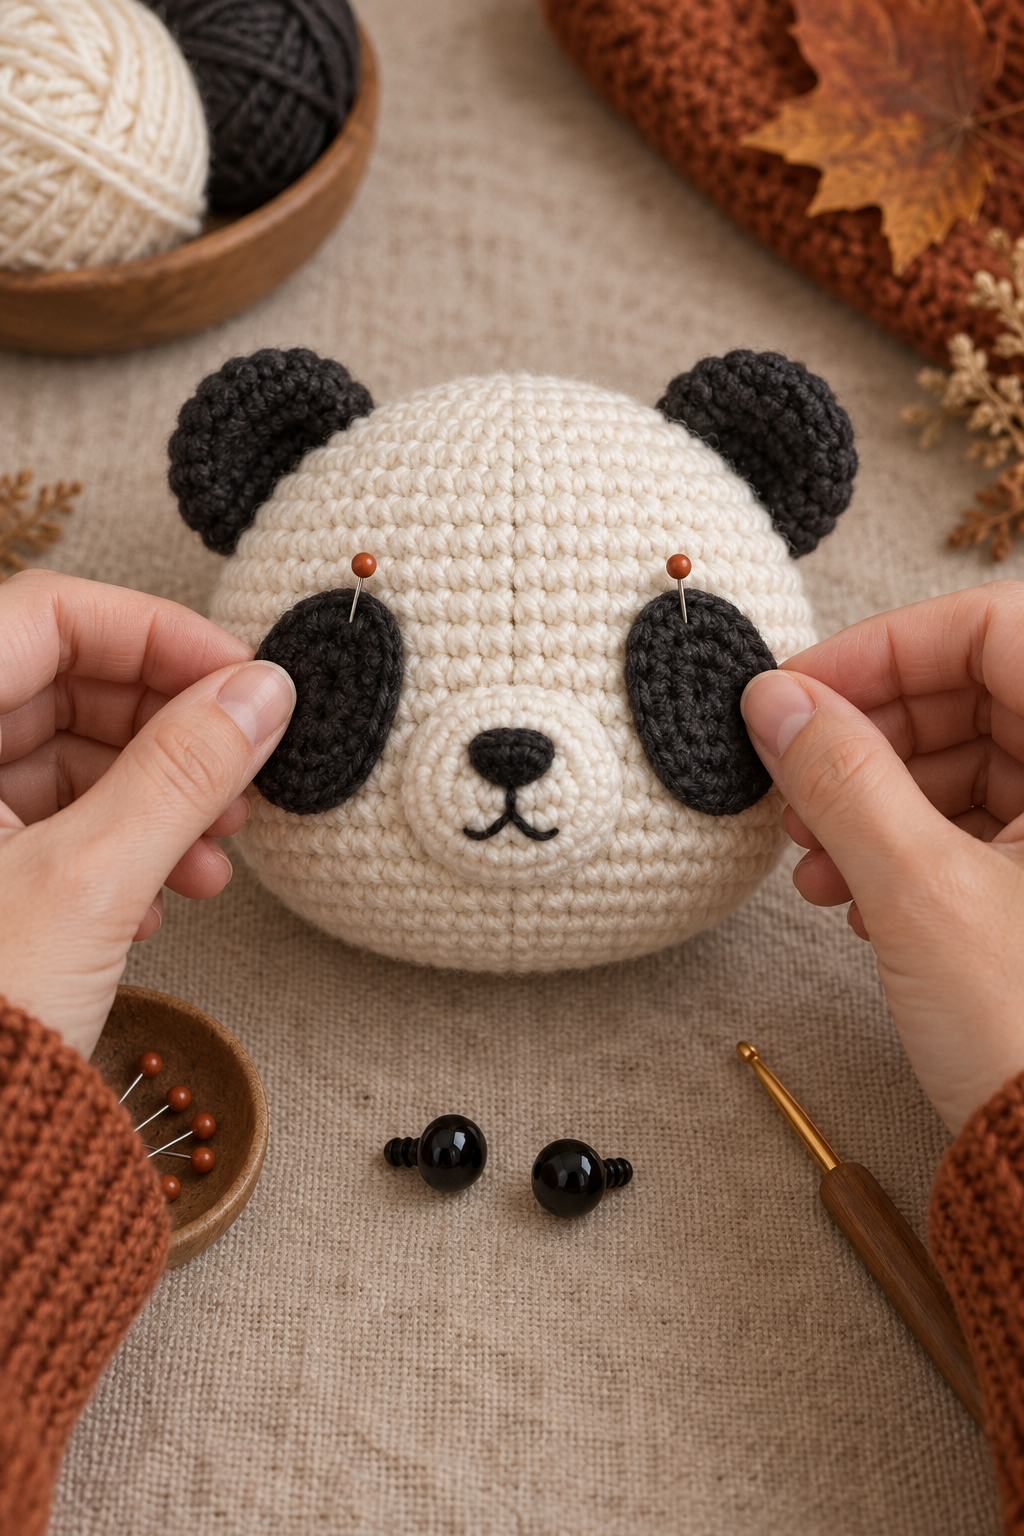
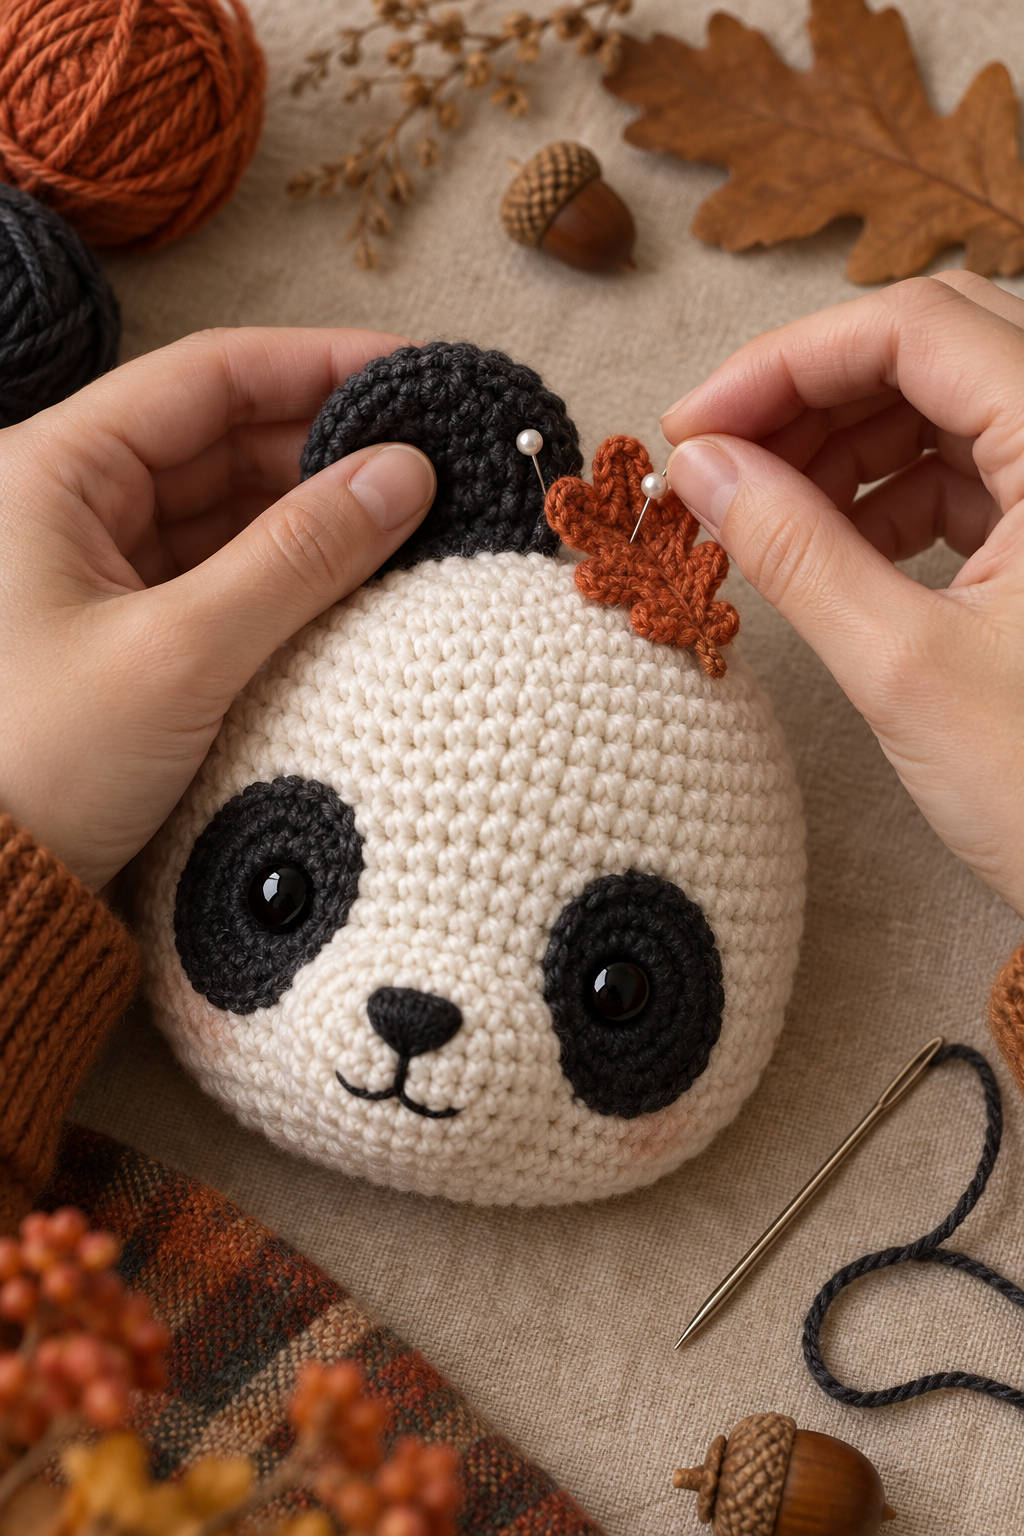
Leaf: with rust yarn, ch 7. From the second chain: sl st, sc, hdc, dc, hdc, sc; ch 2 and sl st into the tip, then mirror the sequence down the other side. Pin one ear above the patch line and pin the leaf beside it. The leaf should decorate the silhouette without covering the eye area.
Part 5: Acorn pouch and strap
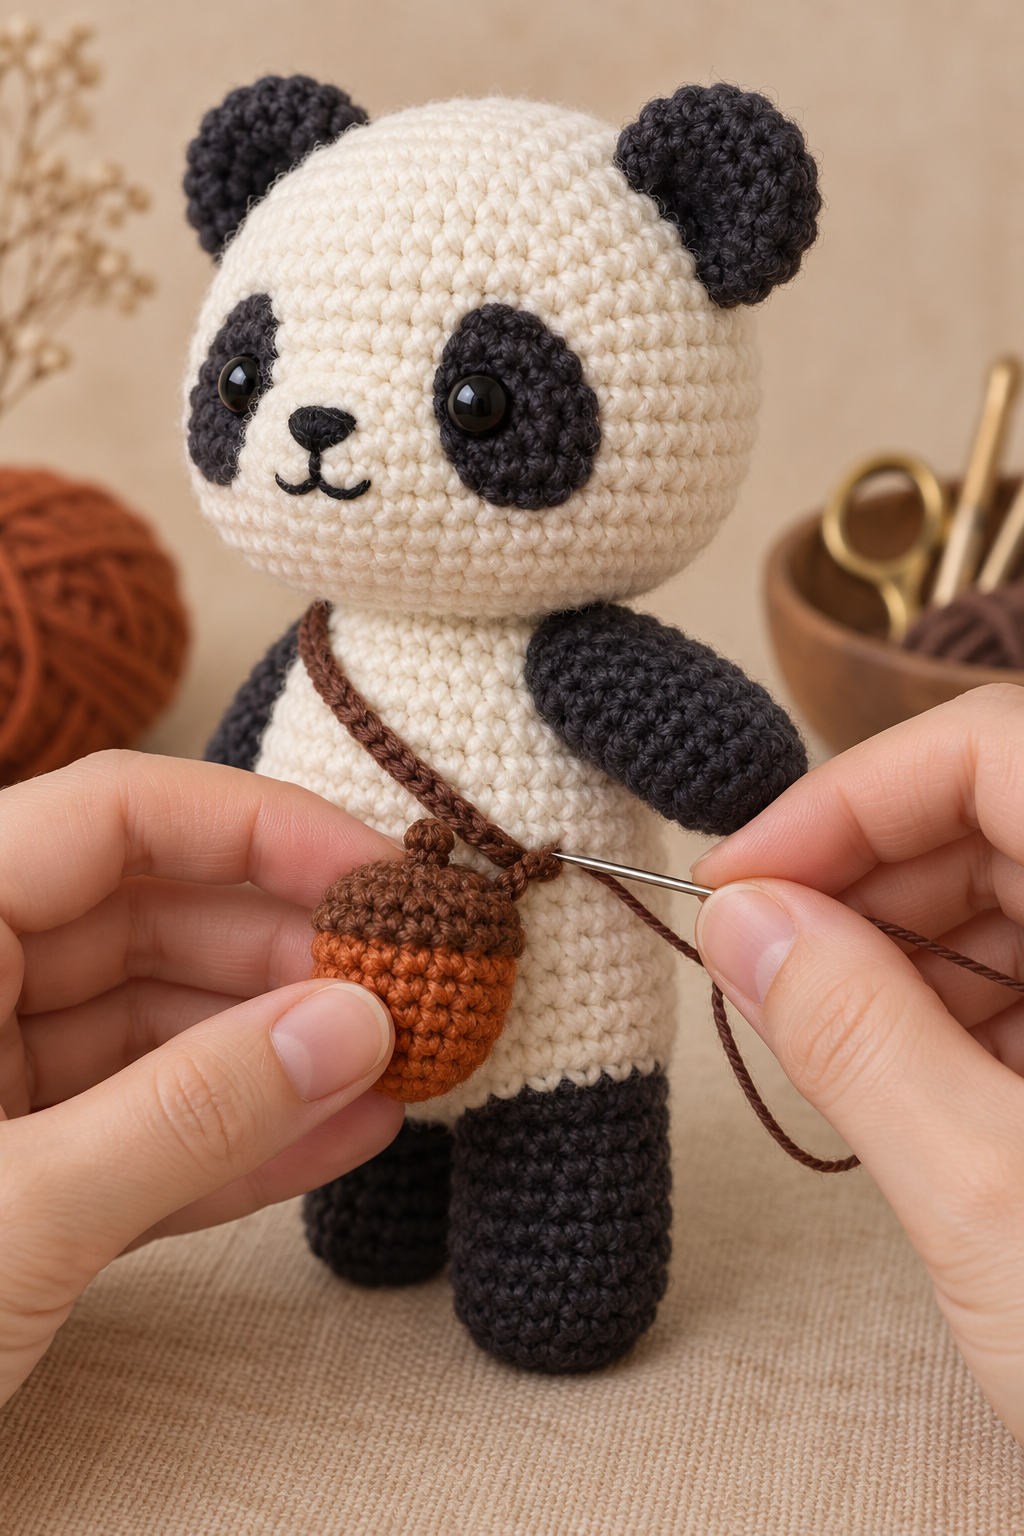
With rust yarn: 6 sc in MR; inc around to 12; sc around for two rounds; (sc, dec) × 4 to 8. Stuff lightly. Join cocoa yarn at the top and sc around for one round; add two loose crossing surface stitches for the cap. For the strap, ch 28 in cocoa. Test it diagonally across the panda first. Sew one end at the shoulder, stitch the pouch at the opposite hip, then secure the second strap end behind the shoulder. The two attachment points stop twisting.
Part 6: Join, secure and test
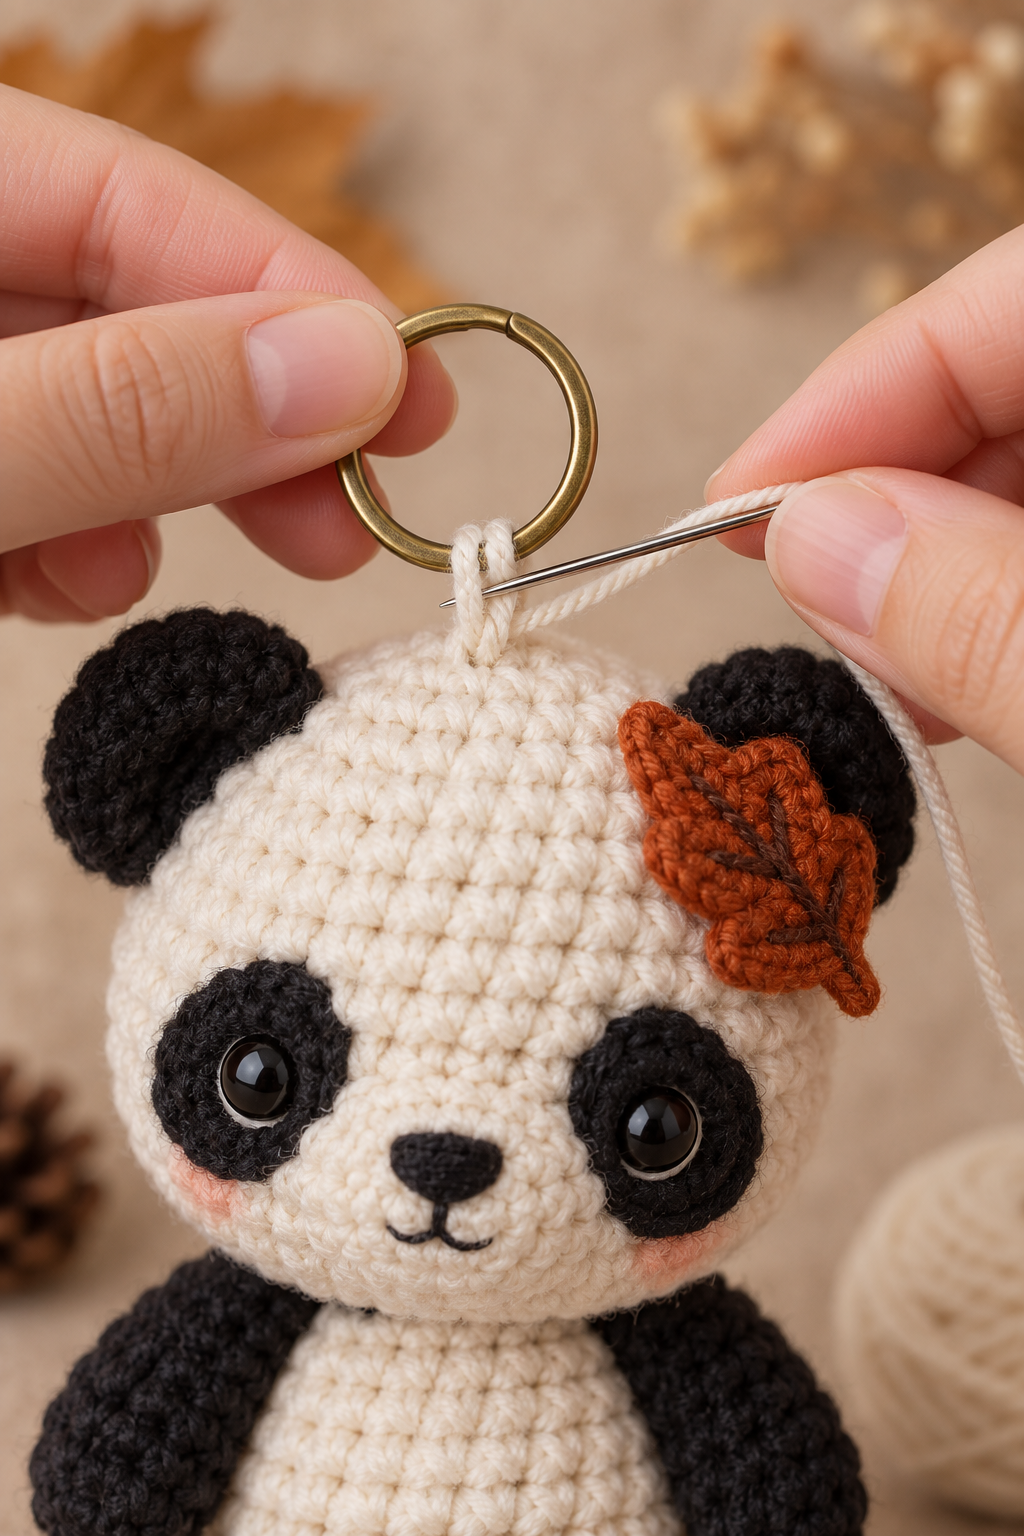
Pin the head centrally over the body. Sew around the join once to close the gap and a second time for support. A finished keychain needs a stronger join than a shelf-only plush. For the ring, pass doubled ivory yarn through the top centre of the head, around the ring, then back through the same head area. Make two complete passes, hide the knot inside, and gently test the loop before trimming.
Technique Lab
- Dense fabric: a smaller hook gives a clean keychain surface and prevents stuffing showing through.
- Markers are measurements: they establish the same leg height on both sides.
- Two-pass seams: the first pass closes, the second supports weight.
- Light accessories: the pouch is only lightly stuffed so it cannot drag the panda forward.
- Hardware test: pull the ring gently in several directions before hiding the final yarn ends.
Troubleshooting
- Uneven legs: unpick the first stitches and return to the marker positions.
- Leaning body: move the legs one stitch forward or remove a little back stuffing.
- Off-centre face: compare patches with the back marker line, not with a stretched outer edge.
- Twisted pouch: add a second anchor at the shoulder and stitch the pouch to the hip.
- Stretching loop: add another yarn pass through the top stitches before trimming.
Frequently asked questions
Can I omit the keyring?
Yes. It becomes a small shelf plush or ornament.
Can I use other autumn colours?
Yes. Mustard, burgundy, olive or teal work well; keep the acorn cap darker than its body.
Is it safe for children?
Use embroidered eyes, omit the hardware, and check every seam carefully.
Final quality check before gifting or using the keychain
Take one minute to inspect your panda as if you were seeing it for the first time. Hold it by the ring, then hold it by the body. The head should stay centred, the body should not rotate under the head, and the ring loop should remain at the top rather than pulling toward an ear. If the loop shifts, do not cover the problem with the leaf; add another pass of yarn through the top stitches and test again.
Next, place the panda flat and look at the front. The lower feet should meet the table at the same level. The arms should appear to start at the same height, even if a small hand-sewn difference is visible from the side. The eye patches should guide the viewer toward the centre of the face, not make the face look wider on one side. These simple checks are the same ones that give professional-looking amigurumi their calm, balanced expression.
Finally, run a fingertip along every yarn tail and attachment. Nothing should feel loose, sharp, or able to catch on a bag lining. For a display keychain, a soft loop is enough; for frequent use, make the keyring loop from doubled yarn and keep the panda away from heavy keys. This is a handmade decoration, not a load-bearing accessory.
Finish your Autumn Panda
Your panda is ready when the limbs are level, the pouch lies flat, the leaf balances the ear, and the ring passes a gentle pull test. Save this tutorial for a seasonal make or a small handmade gift; the marker-led placement and close assembly checks transfer to any future amigurumi.
More in Amigurumi