How to Change Colors in Crochet: A Clear Beginner Guide to Neat Edges

Changing yarn color is one of the small skills that makes crochet feel much more creative. Once you can make a clean color change, the same basic move lets you add stripes, simple blocks of color, borders, lettering practice, and playful details to almost any project. This lesson teaches the dependable version for a single crochet swatch, then shows how to adapt the idea at a row end or in the middle of a row.
The goal is not to hide every join magically. The goal is to make a deliberate, tidy transition that keeps the edge comfortable, the stitch height even, and the yarn tails secure. Work slowly for your first two or three changes. After that, your hands will begin to recognize the exact moment to introduce the new yarn.
Quick facts
- Skill level: confident beginner.
- Terminology: US crochet terms. The sample uses single crochet (sc); in UK terms, that stitch is double crochet.
- Best first practice: two smooth, light-colored yarns in the same weight.
- Core rule: bring in the new color for the last pull-through of the stitch before the color change.
- Time: about 20 to 30 minutes for a useful practice swatch.
Materials and the tiny vocabulary you need
Choose two yarn colors that are easy to distinguish. A medium-weight yarn and a hook that suits its label are comfortable for practice. You will also need scissors, a tapestry or yarn needle, and optionally two locking stitch markers. Call the yarn you are currently using the outgoing color; call the yarn you are adding the incoming color. A loop is each strand resting on the hook. A tail is the short loose yarn end left after a color is cut or joined.
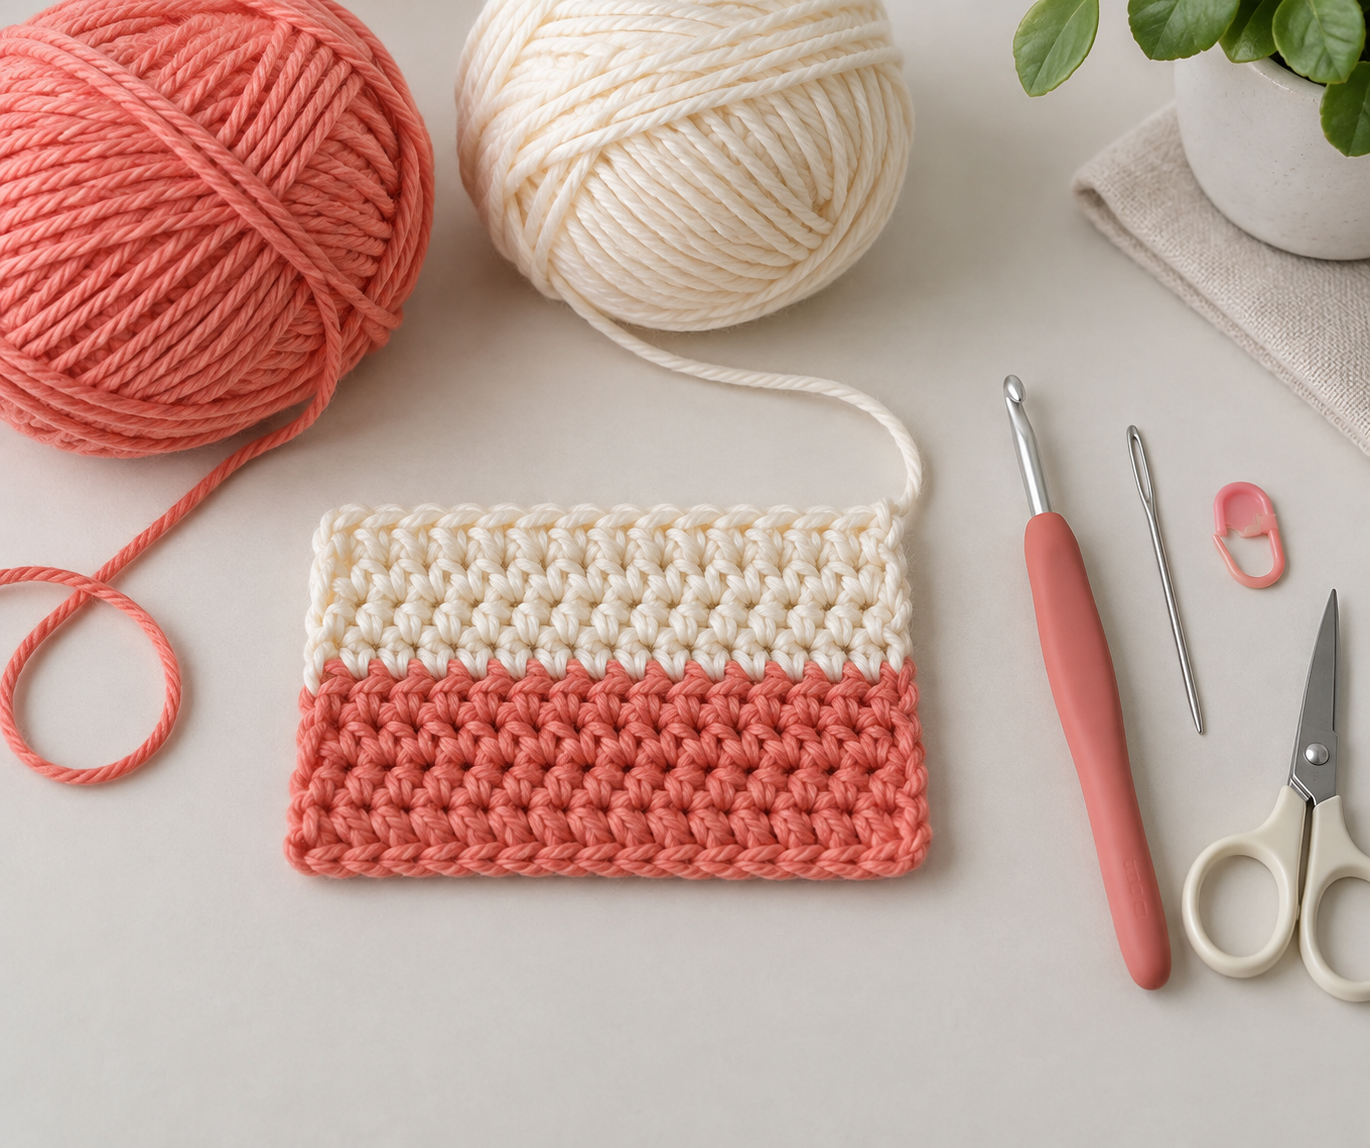
For this lesson, make any small foundation chain that feels manageable, then work one or two rows of single crochet in the outgoing color. There is no special count to memorize: the technique is the lesson. Keep a 4-inch/10-cm tail when you begin the incoming color so you have enough yarn to weave in later.
Your visual roadmap
- Prepare both colors so neither yarn is trapped under the project.
- Work the outgoing stitch almost to the end and stop with two loops on the hook.
- Use the incoming color for the final pull-through.
- Continue with the new color while keeping the first stitch relaxed.
- Secure the tails on the wrong side and inspect the fabric.
Think of the final pull-through as the doorway into the next color. The stitch below the hook is still structurally the outgoing-color stitch, but its top loop is made with the incoming color. That is why the next stitch begins in the correct color and the boundary looks clean.
Step 1: Decide exactly where the color begins
Look at your row and choose the stitch after which you want the new color to appear. For a wide stripe, this may be the final stitch of the row. For a small color block, it may be a stitch in the middle. Place a locking marker in the stitch just before the planned change if you are still learning; it gives your eyes a calm reference point.
Lay the incoming yarn behind or beside your work, with its tail pointing away from the hook. Do not tie the two yarns into a hard knot. A knot can make a thick bump and it does not solve tension problems. Instead, leave the tail loose until you weave it in at the end.
Step 2: Begin the final outgoing-color stitch, but do not finish it
Work normally until you reach the stitch immediately before the new color should show. Insert your hook through both top loops of that stitch, yarn over with the outgoing color, and pull up a loop. In single crochet, you now have two loops on the hook. Pause here.
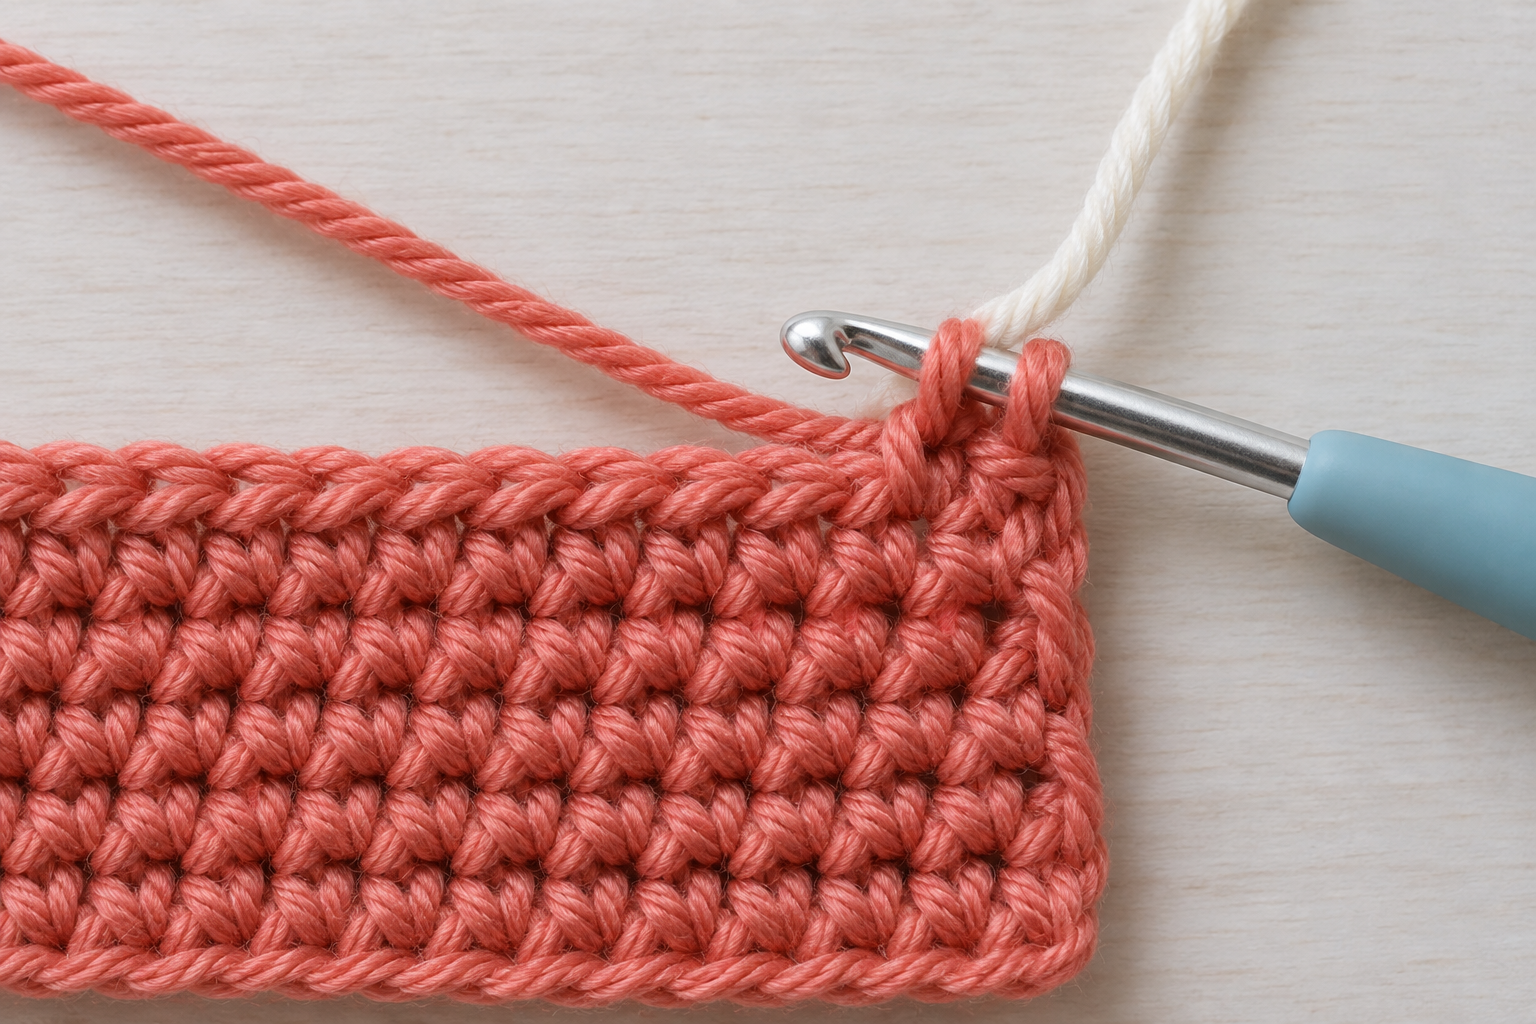
This pause is the most important part of the lesson. For a single crochet, the last action is pulling yarn through two loops. If you complete that action with the old yarn and then add the new yarn afterward, the color change sits one stitch too late and makes a small dot or jog. Stopping with two loops left puts the new color exactly at the top of the correct stitch.
Checkpoint: look at the hook before moving on. There should be two loops, both in the outgoing color. The fabric should not be stretched upward. If there is only one loop, you have finished the stitch; gently undo one movement and try again.
Step 3: Let the incoming color complete the stitch
Pick up the incoming yarn, leaving its tail free. Hold the working strand over the hook as for an ordinary yarn over. Draw this new yarn through both outgoing-color loops in one smooth motion. You now have one loop on the hook, and it is the incoming color.
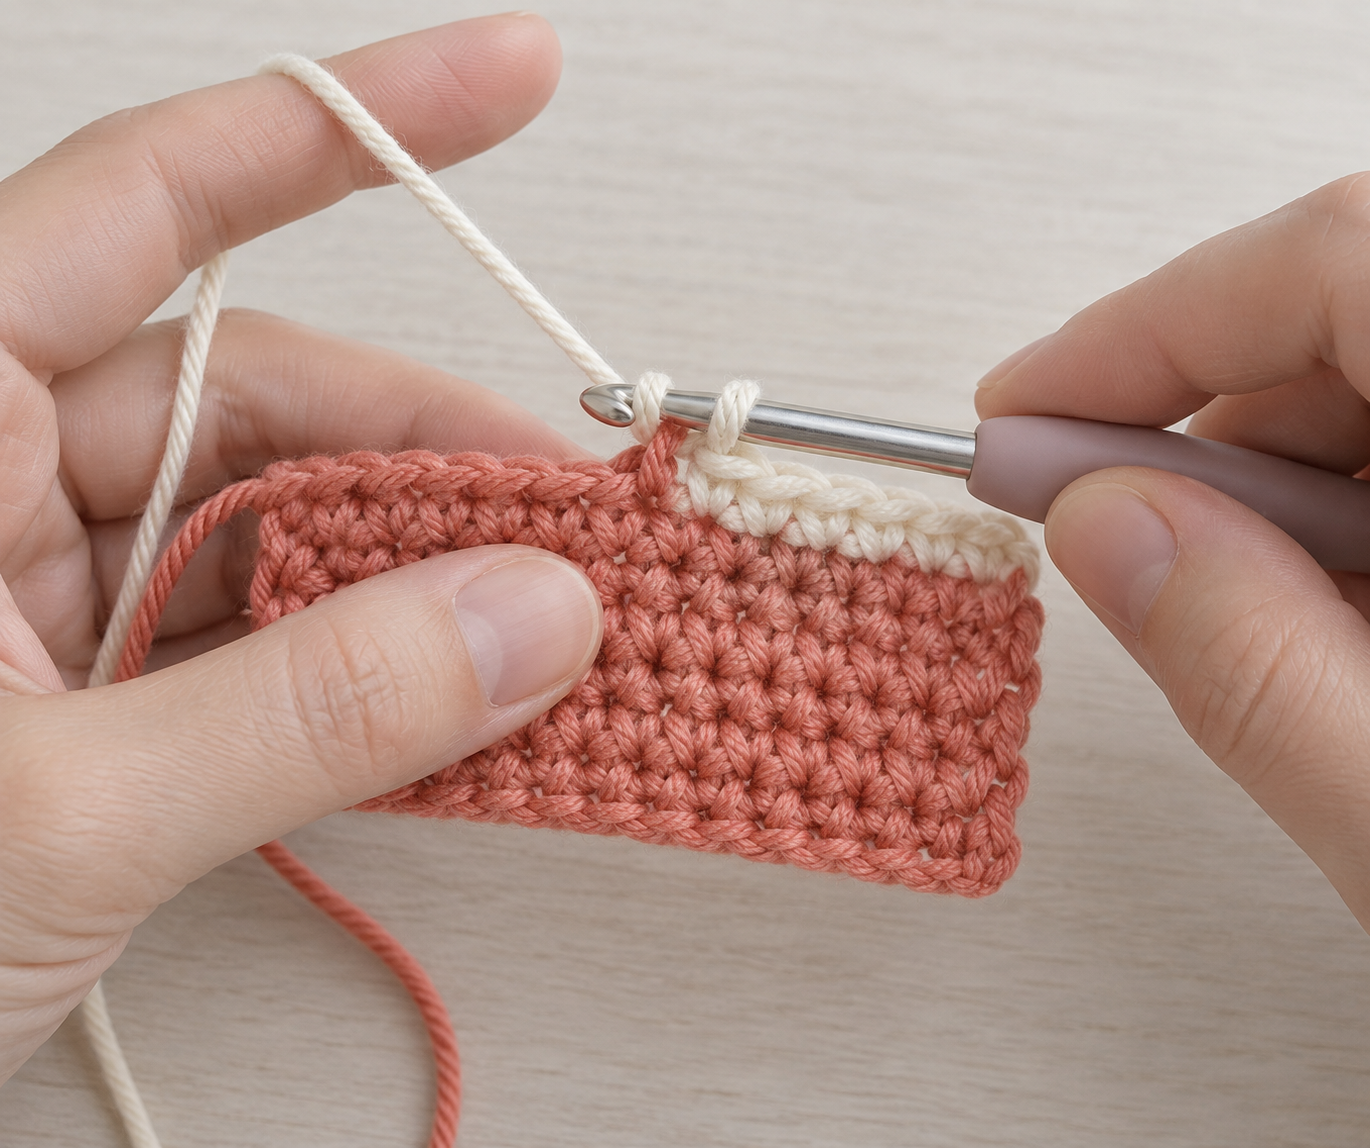
Give the two tails a very small, friendly tug only to settle the join; do not cinch them. The edge should stay the same height as its neighbors. Then make your next single crochet with the incoming color. That first new-color stitch can look slightly loose while you are holding two yarns. Let it be a little relaxed, then adjust its size using the working yarn rather than pulling on the tail.
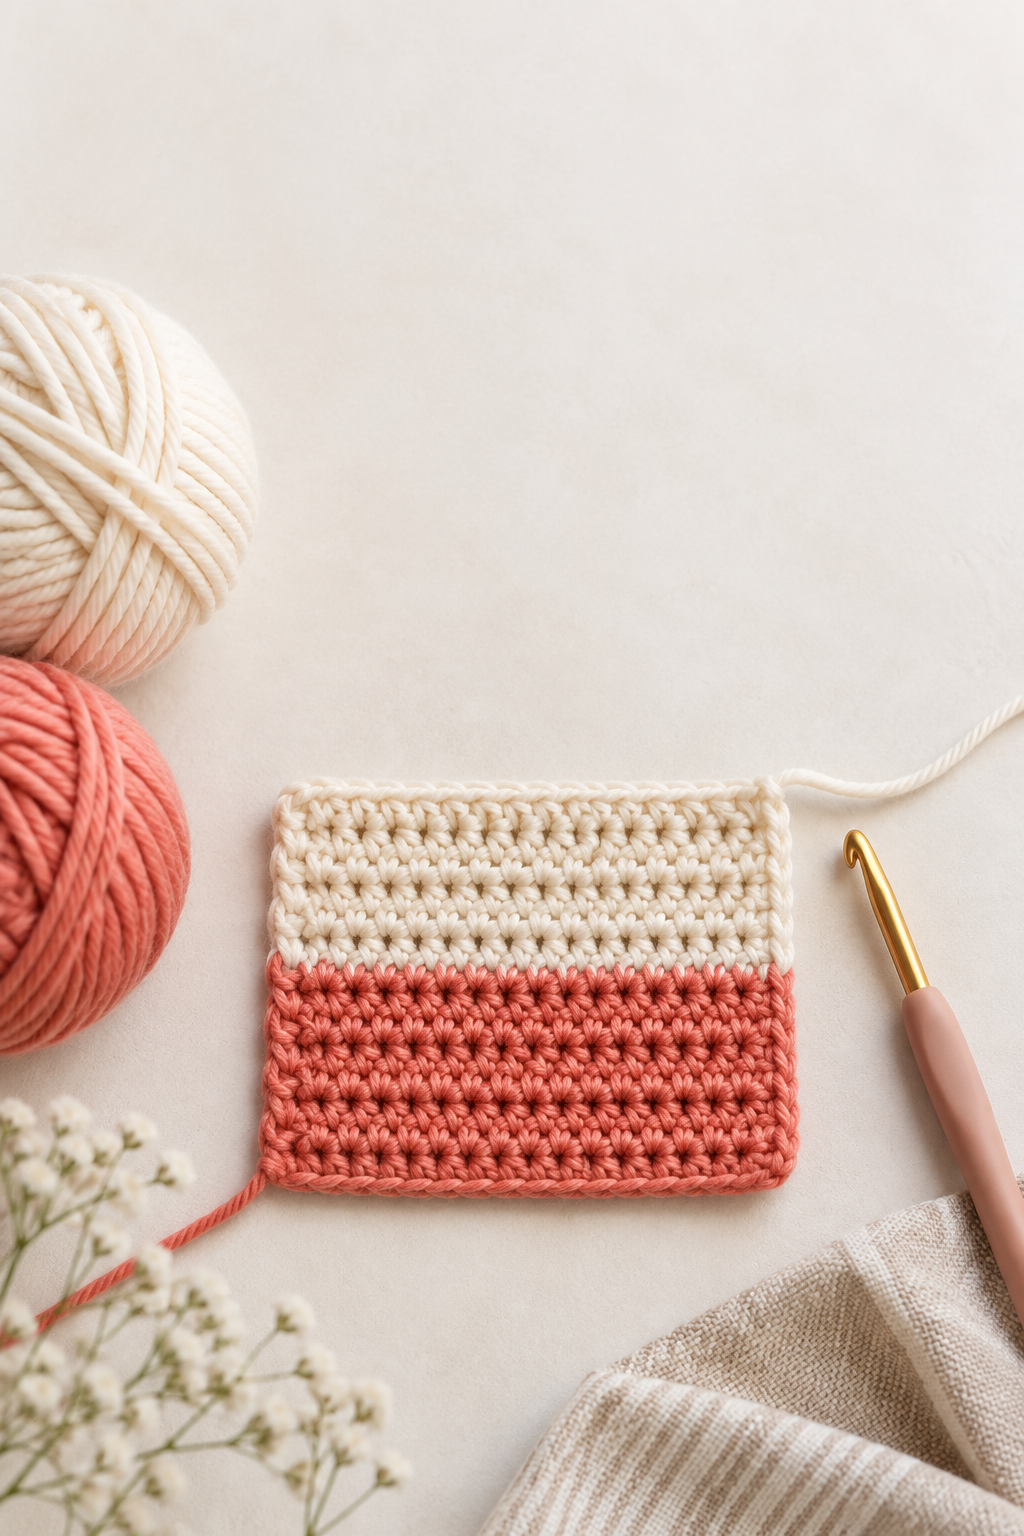
Imagine you are making a coral-and-cream stripe and the cream loop looks tiny after the change. Do not pull the cream tail. Pulling the tail steals yarn from the join and puckers the fabric. Instead, place the hook in the next stitch, draw up a normal working loop with cream, and let the first loop settle naturally.
Step 4: Keep the color boundary even as you continue
Continue across the row with the incoming color. For a clean beginner swatch, cut the outgoing color after the change, leaving a 4-inch/10-cm tail. This is the least confusing choice and it prevents unused yarn from showing through a light fabric. If you will return to the previous color very soon, you may carry it loosely along the wrong side, but only when the distance is short and the fabric is not likely to be stretched.
At a row end, use the same rule. Work the final stitch of the row with the outgoing color until two loops remain on the hook. Pull the incoming color through those two loops. Turn the work, make the turning chain with the incoming color if your stitch pattern uses one, and begin the new row. The side edge will be much neater than if you switch after turning.
Checkpoint: lay the swatch flat after each changed row. A good color change makes a straight boundary without a pulled-in corner. If the edge curves inward, your final pull-through or first new stitch is too tight. If a long loose loop sticks out, make the next stitch a touch smaller with the working yarn.
Step 5: Weave in the tails only after the fabric is stable
When your practice swatch is finished, turn it to the wrong side. Thread one tail onto the yarn needle. Travel through several nearby stitch backs in the same color, change direction, then travel through several more. This change of direction helps the tail stay put through ordinary use and washing.
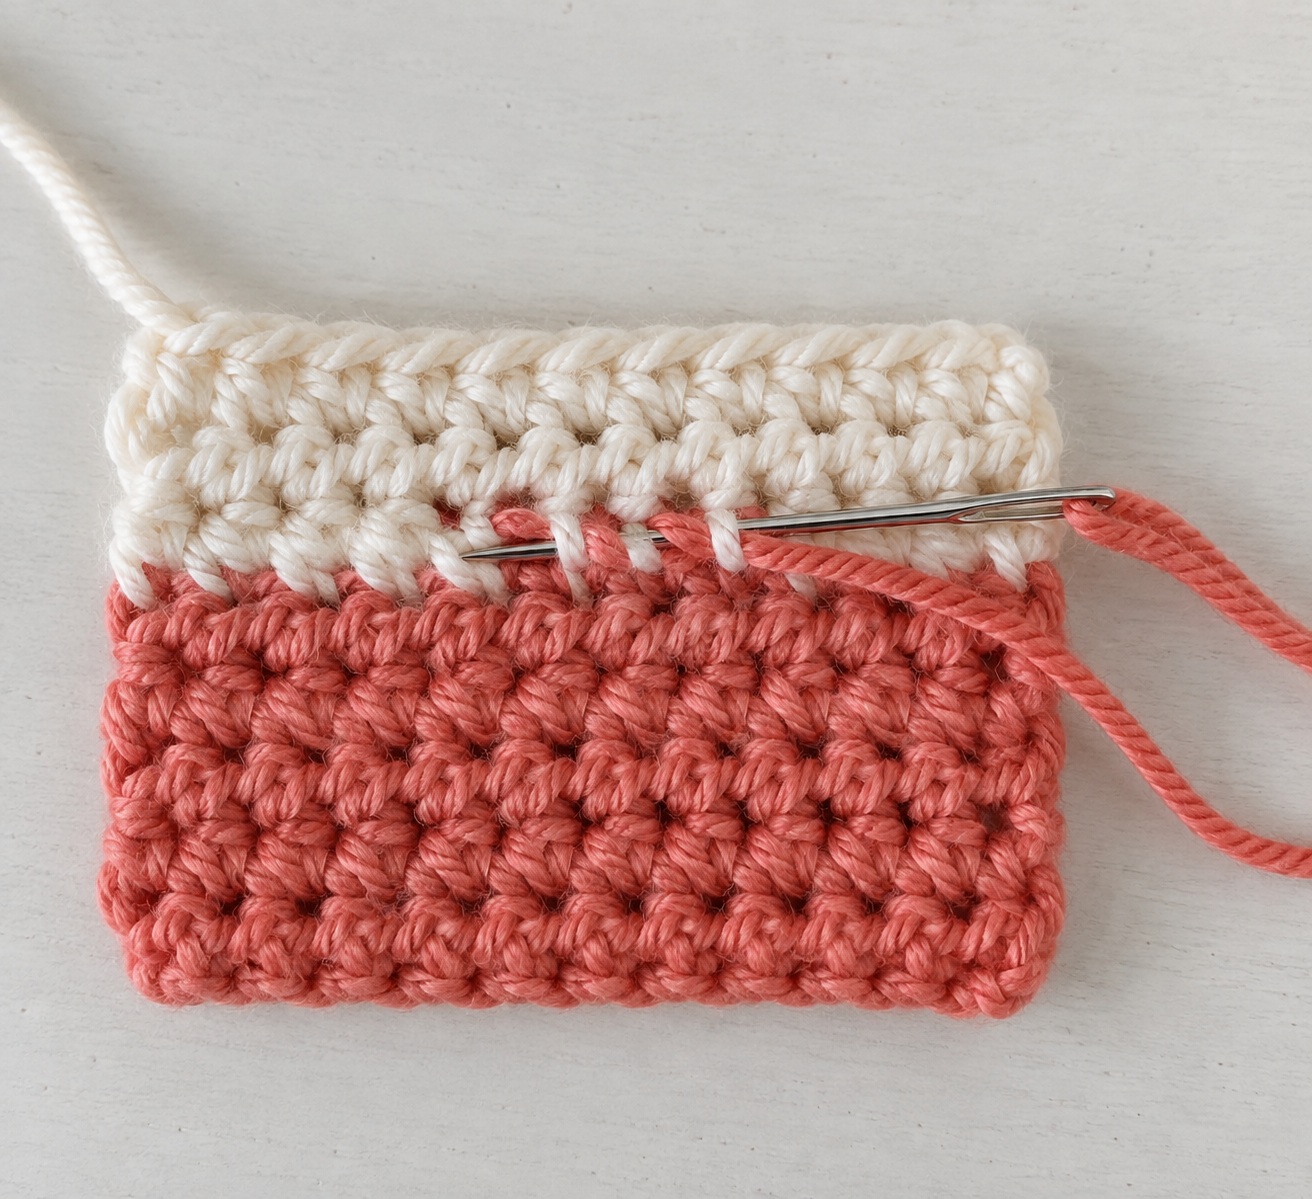
Keep the needle inside the thickness of the stitches rather than crossing a visible gap. Pause after the first pass and turn the swatch right side up: no tail should show through the front. If it does, remove it and choose a slightly deeper path. Trim only after the tail is secure and the fabric still lies flat.
Technique Lab: make the change work in real projects
For taller stitches: the timing stays the same, but the final pull-through changes. In a half double crochet, bring in the new color for the final pull-through through all loops. In a double crochet, work the stitch until the last two loops remain, then pull the new color through those final two loops. The incoming color always makes the top of the stitch.
For a planned stripe: change color at the final stitch of the old-color row. Put a marker in the first stitch of the next row if your edges are hard to read. Markers are not a sign that you are slow; they are a way to protect your stitch count while your hands learn a new movement.
For a small motif: cut the old color if it will not be used again soon. Carrying yarn across a long distance can create floats that catch fingers or show through pale areas. If you need a crisp picture-like design, learn the basic change first, then move to an intarsia or tapestry method with a separate plan for each color area.
For slippery or fuzzy yarn: leave longer tails and weave through more stitch backs. The join itself should still be made by the final pull-through; extra tail security comes afterward, not from tightening the join into a knot.
Common problems and calm fixes
- The new color appears one stitch late. You changed after finishing the old stitch. Undo to the final pull-through and introduce the new yarn through the remaining loops.
- The edge is tight. The incoming loop was pulled too firmly. Undo one or two stitches, remake the change, and keep the new loop the same height as your usual loops.
- A tail peeks through the front. Reweave it deeper inside same-color stitch backs; avoid pulling it across open spaces.
- The colors look twisted at the join. Check that the incoming working yarn, not its tail, was pulled through the two loops. Then keep the tail behind the fabric while you work the next stitch.
- The fabric has a bump. A knot or several tails may be stacked together. Remove the knot if possible, use a plain join, and spread woven tails in different directions.
Frequently asked questions
Do I need to knot yarn when changing colors? No. A properly woven tail is usually smoother and more reliable than a tight knot. A small temporary knot may help some people keep yarn from slipping while practicing, but it should not be the structure holding the project together.
Can I change color in the middle of a row? Yes. Use the exact same final-pull-through method in the stitch immediately before the new color begins. Choose whether to cut or carry the unused yarn based on how soon you will return to it.
Why does the wrong side look messier? Color changes naturally leave tails and, if you carry yarn, short strands on the wrong side. The right side is the visual priority; the wrong side should simply be secure, untangled, and comfortable.
Should I weave in tails before continuing? For a small practice swatch, wait until the end. In a large project, you can weave tails in periodically so they do not tangle, but leave enough worked fabric around the join to make the path secure.
Finish your practice swatch with confidence
A neat crochet color change is built from one repeatable decision: pause before the final pull-through and let the next color make it. Make a few short stripes in your swatch, inspect them from both sides, and notice how the first stitch of the new color behaves. Save the swatch with your tools; it is a useful reference the next time a striped border or color-block idea appears in a project. When this movement feels automatic, you are ready to add color intentionally instead of hoping the join disappears.
More in Stitches & Techniques
How to Crochet the Moss Stitch: A Complete Beginner Guide to Even, Woven Fabric
How to Change Colors in Crochet: A Clear Beginner Guide to Neat Edges