How to Crochet a Women’s Winter Beanie: Easy Textured Hat with Folded Brim

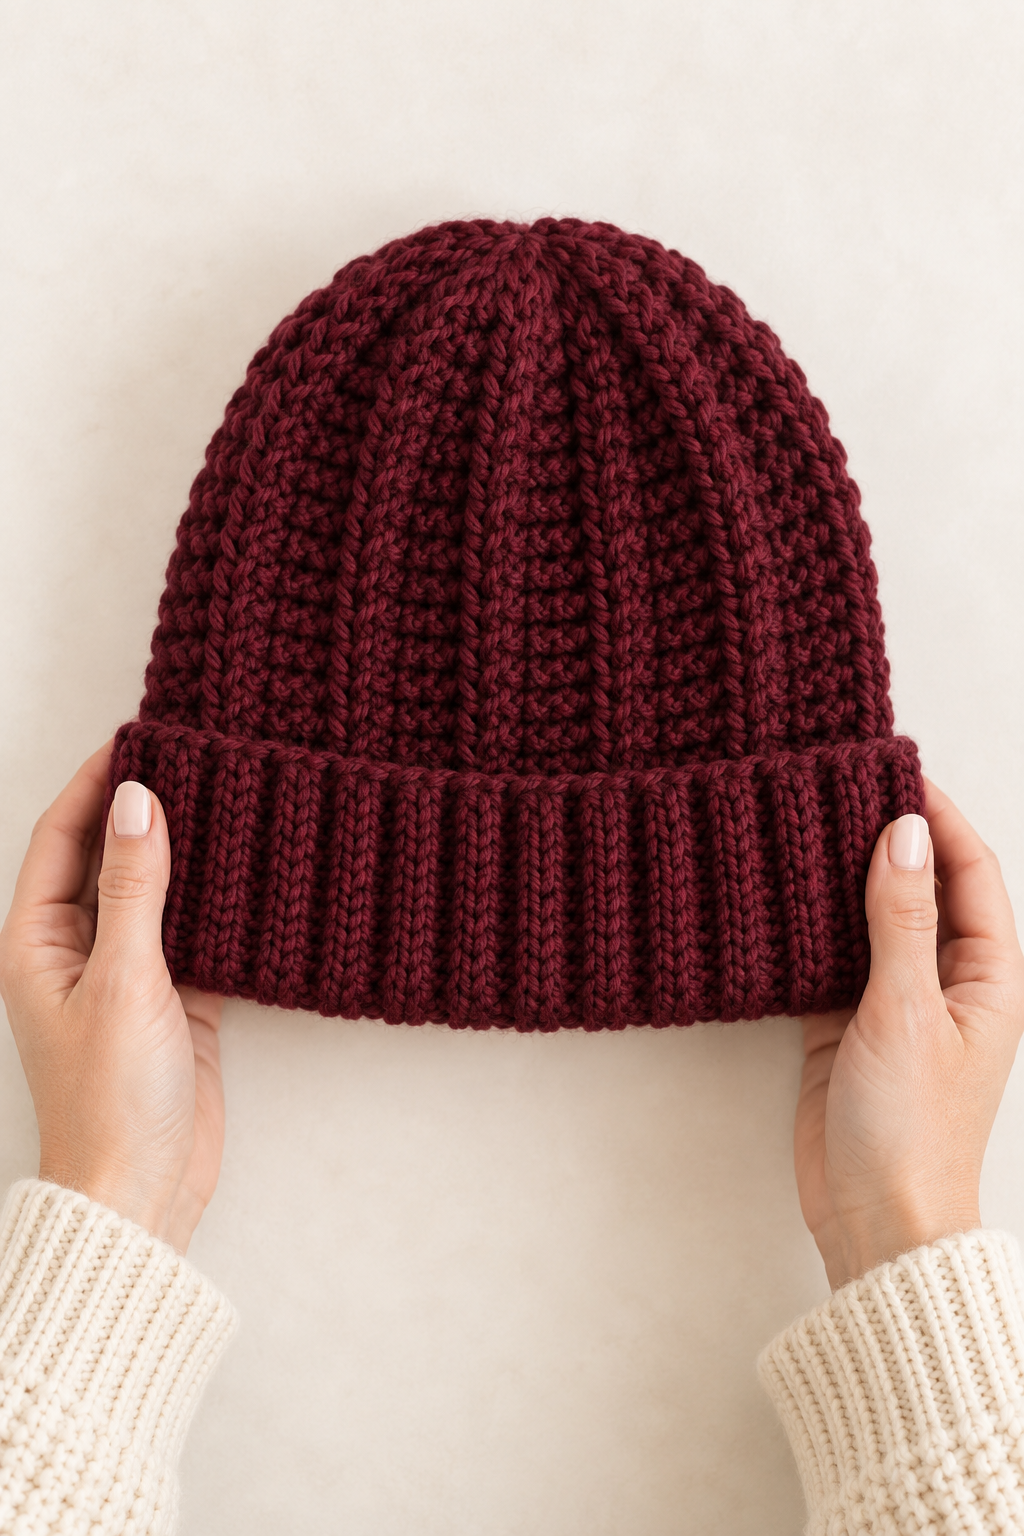
A handmade winter beanie is one of the most useful crochet projects to keep in your repertoire: it is warm, wearable, and forgiving enough to teach you how shaping works in the round. This women’s winter beanie uses a smooth half double crochet fabric, a gently rounded crown, and a folded brim that adds warmth around the ears without adding complicated stitches.
The sample is written for a typical adult women’s fit. It is worked from the top down in joined rounds, so you can pause after the crown, measure the depth, and make small adjustments before you commit to the brim. The pattern uses US crochet terms. Make a swatch when possible, because yarn thickness and personal tension can change the fit more than the label “women’s” suggests.
This is an original Mini Fun Box tutorial. Save it before you begin so the stitch-count table and finishing notes are easy to return to as you work.
Quick facts
- Skill level: confident beginner
- Terminology: US crochet terms
- Construction: top-down, joined rounds
- Finished fit: adult women’s, approximately 20–22 in / 51–56 cm head circumference with comfortable stretch
- Estimated making time: a relaxed weekend project; speed depends on yarn, tension, and experience
Materials
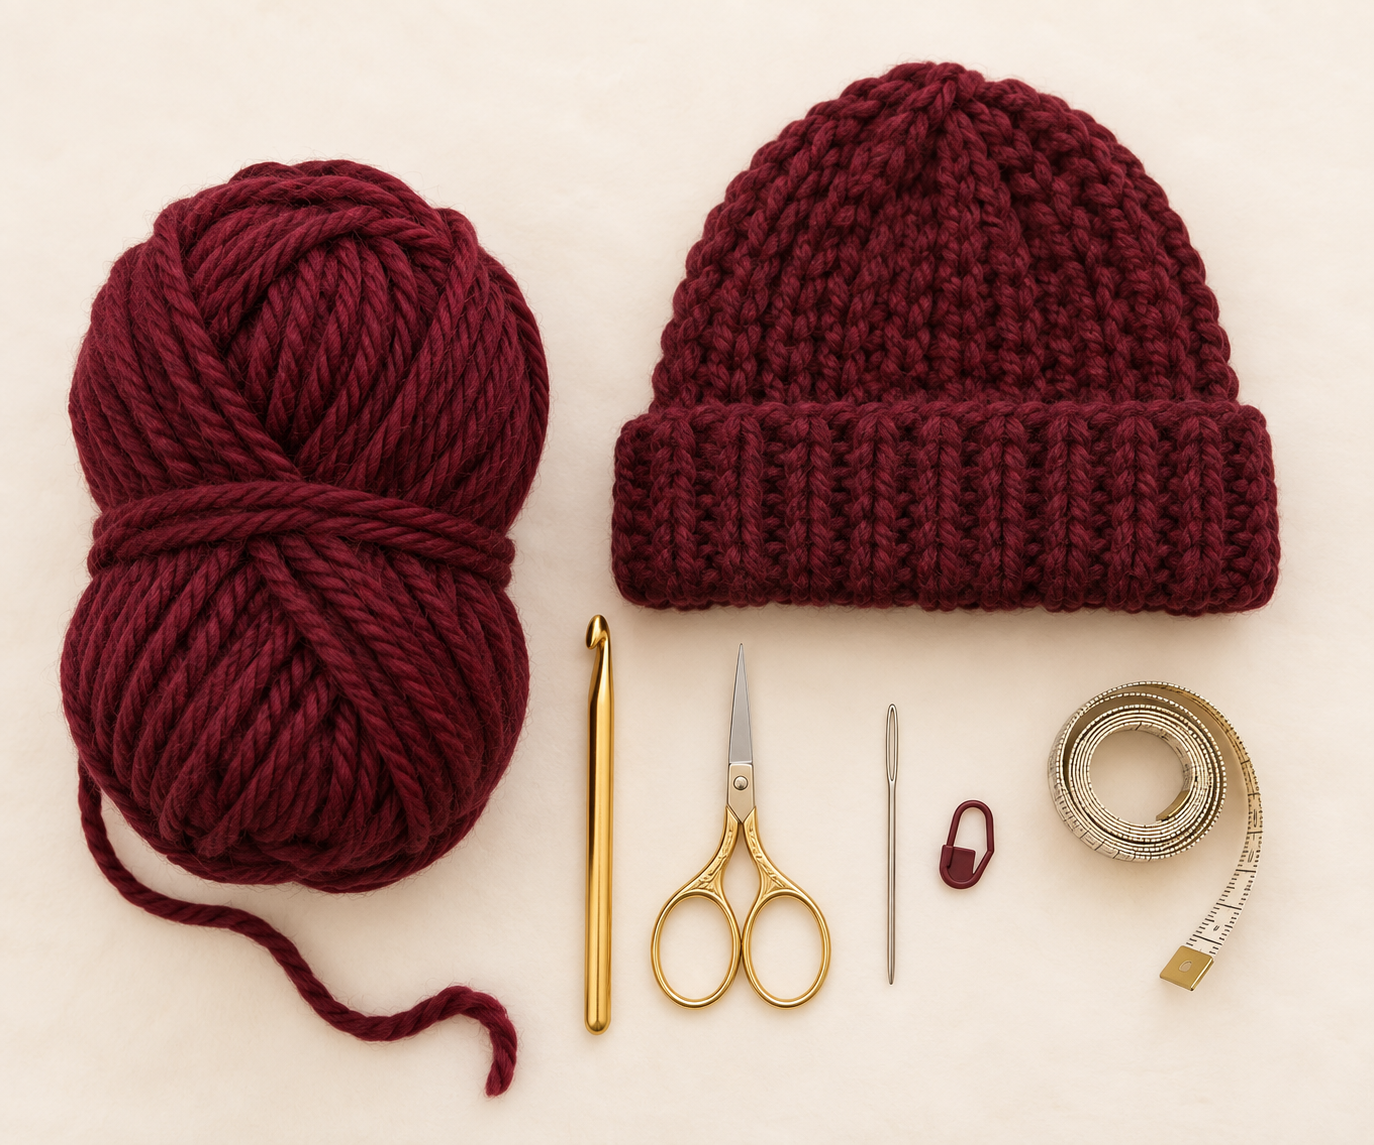
- About 110–130 g of smooth bulky or chunky yarn. Wool, wool blend, or a washable acrylic blend can all work; avoid yarn that is extremely fuzzy while learning.
- 6 mm crochet hook, or the hook that gives you a flexible fabric.
- Blunt yarn needle.
- Scissors.
- One removable stitch marker, optional but strongly recommended.
- Tape measure.
A dense beanie can feel warm but uncomfortable, while a very loose one lets wind through. Your goal is a fabric that bends easily in your hands and stretches gently across the head. If the yarn label recommends a slightly larger hook, make a small swatch before changing the pattern; the crown measurement matters more than copying another maker’s tension.
Abbreviations
- ch = chain
- hdc = half double crochet
- inc = increase; work 2 hdc in the same stitch
- sl st = slip stitch
- st = stitch
- BLO = back loop only
- rnd = round
A half double crochet begins with a yarn over. Insert the hook, pull up a loop, then yarn over and pull through all three loops on the hook. It is taller than single crochet and shorter than double crochet, making a nicely warm fabric without a lot of open space.
Before you begin: the two rules that protect your stitch count
Place a marker in the first real stitch of each round before you continue. In this pattern, the beginning chain 2 does not count as a half double crochet. When you reach the end of a round, join with a slip stitch to the first real hdc, not the chain. This one habit makes the edge much easier to read.
Also, count the crown before starting the straight body. An increase means two complete hdc stitches in the same V-shaped stitch. Do not count the two loops on your hook as stitches. A correct count gives the crown enough circumference to become a hat; a missed or extra increase can leave you with a beanie that is tight or wavy from the first try.
How the beanie is built
You will first make a flat circular crown. Six increase rounds grow that circle to 60 stitches. Next, you work straight rounds with no increases so the fabric turns downward and becomes the body of the hat. Finally, five back-loop-only rounds create subtle horizontal ridges that fold into a soft double layer around the ears.
| Round | Instruction | Stitch count |
|---|---|---|
| 1 | 10 hdc in a magic ring | 10 |
| 2 | inc in every st | 20 |
| 3 | *inc, hdc in next st; repeat | 30 |
| 4 | *inc, hdc in next 2 sts; repeat | 40 |
| 5 | *inc, hdc in next 3 sts; repeat | 50 |
| 6 | *inc, hdc in next 4 sts; repeat | 60 |
| 7–18 | hdc in every st | 60 |
| 19–23 | hdc BLO in every st | 60 |
Step 1: Make the magic ring and first round
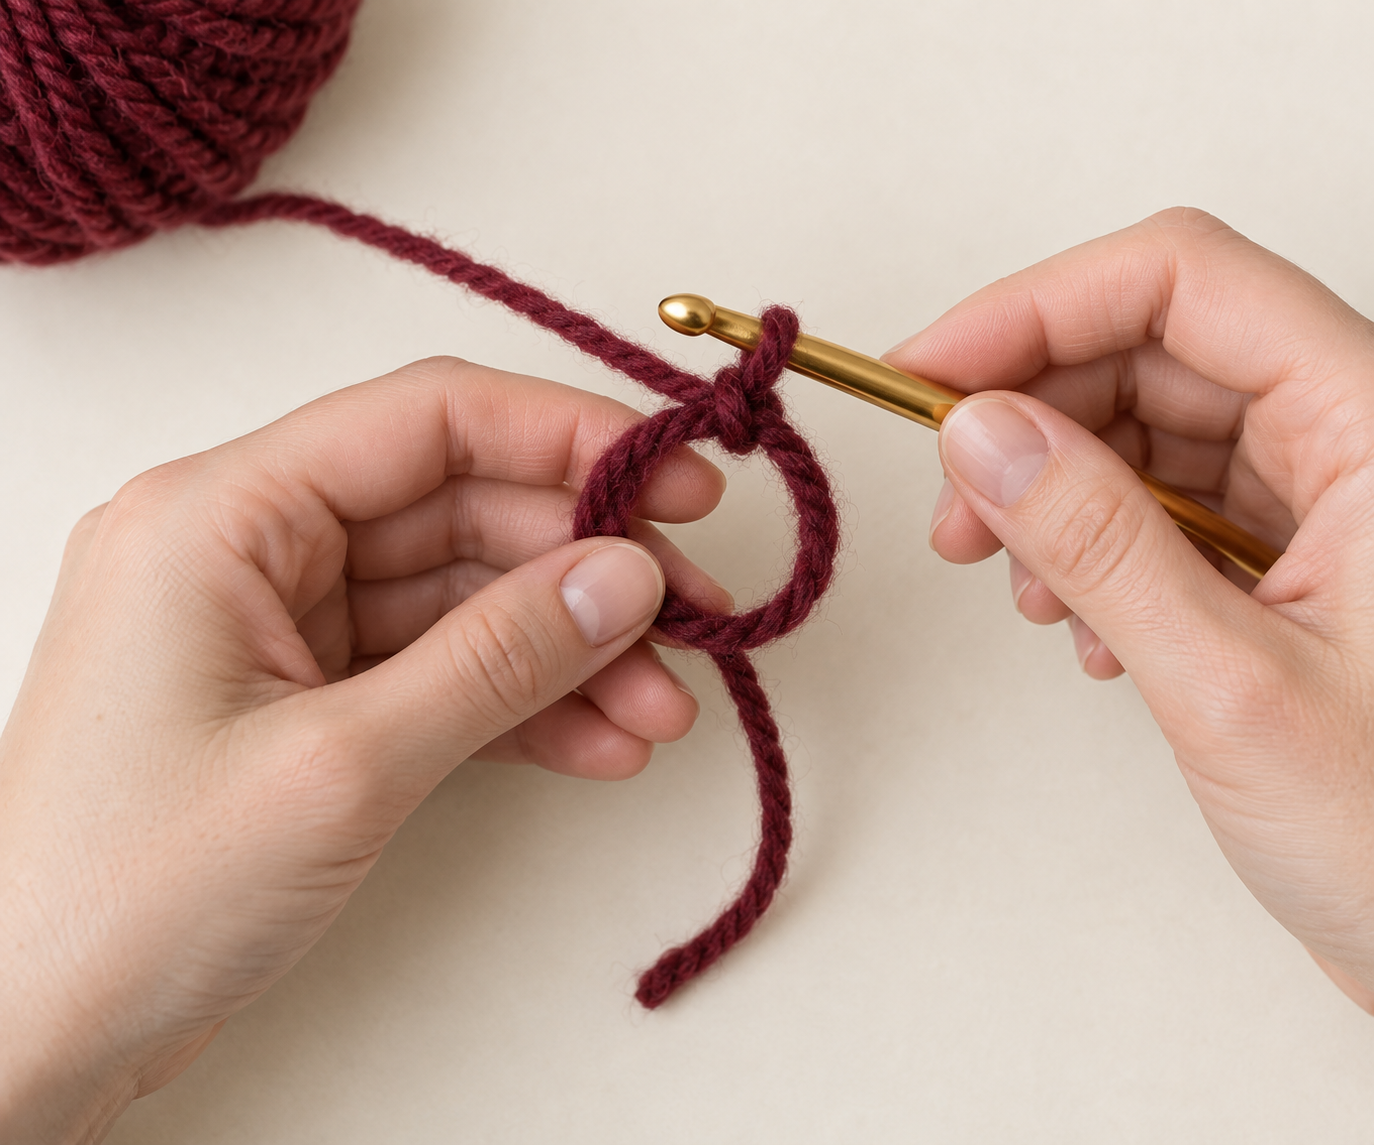
Make a magic ring, then chain 2. The chain does not count as a stitch. Work 10 hdc into the center of the ring. Slide the stitches apart with your fingers if they start to stack on top of one another. Pull the tail firmly to close the center, then join with a slip stitch to the first real hdc.
What to look for: a small, flat circle with ten clear stitch tops around the outside and no visible hole in the middle. If the center will not close, check that you are pulling the tail connected to the adjustable loop rather than the working yarn.
Step 2: Grow a flat crown with even increases
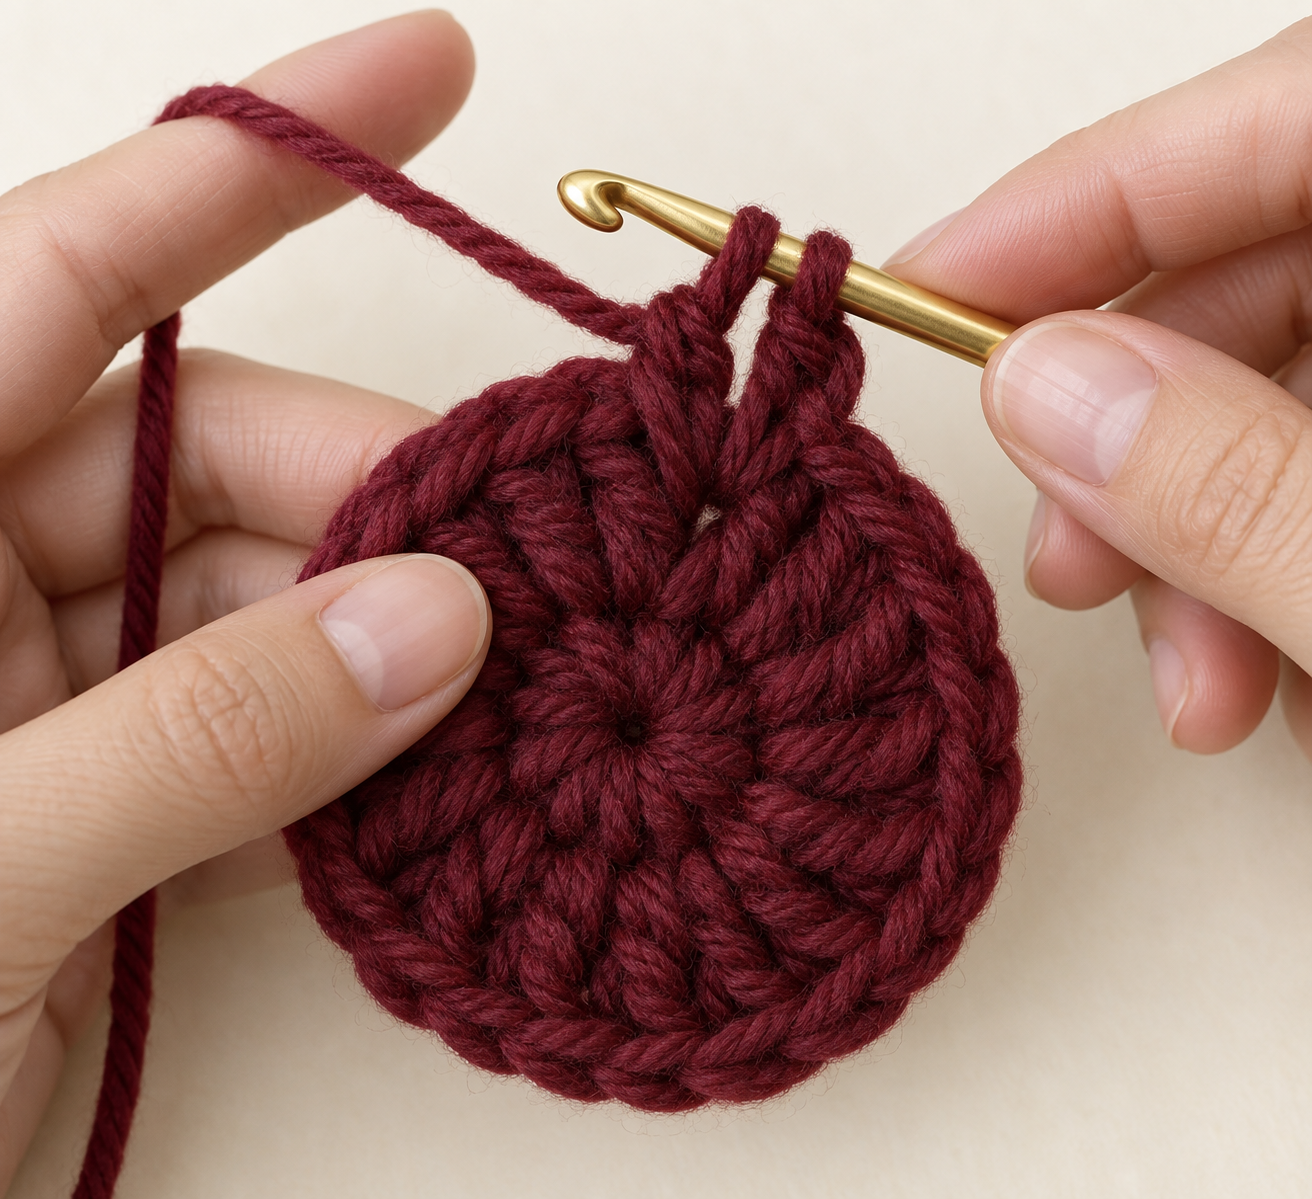
For every crown round, chain 2, work the stated repeat, then slip stitch to the first real hdc. The chain is only turning height, so leave it out of your count.
Round 2: 20 stitches
Work 2 hdc in every stitch around. Count 20 before joining.
Round 3: 30 stitches
Repeat: 2 hdc in the next stitch, then 1 hdc in the following stitch. Repeat the two-stitch rhythm ten times.
Round 4: 40 stitches
Repeat: 2 hdc in the next stitch, then 1 hdc in each of the next 2 stitches.
Round 5: 50 stitches
Repeat: 2 hdc in the next stitch, then 1 hdc in each of the next 3 stitches.
Round 6: 60 stitches
Repeat: 2 hdc in the next stitch, then 1 hdc in each of the next 4 stitches. Join and lay the crown on a flat surface.
Checkpoint: with bulky yarn, the finished crown commonly measures around 6¾–7½ in / 17–19 cm across before stretching. The exact measurement depends on your yarn and hook, so use the flatness of the circle and the intended wearer’s head measurement together. If the circle cups sharply, recount for a missed increase before changing anything. If it ripples, recount for an accidental extra increase.
Step 3: Crochet the straight textured body
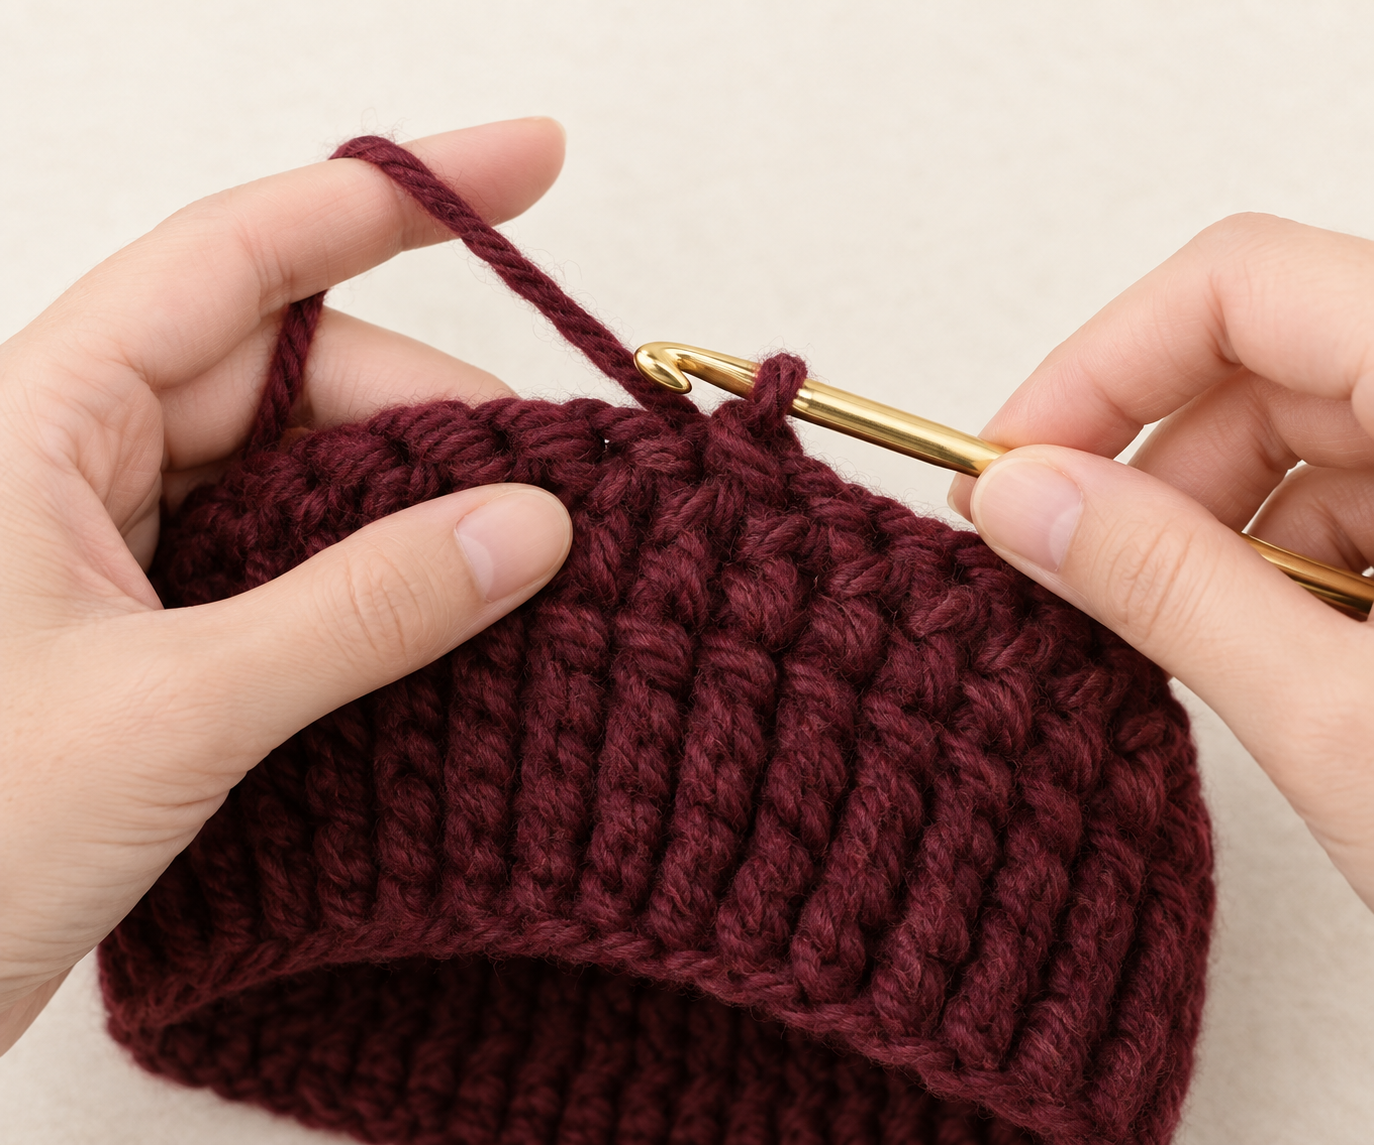
Rounds 7 through 18 are simple: chain 2, work 1 hdc in every stitch around, and join to the first real hdc. Keep 60 stitches in each round. With no more increases, the circle begins to curve downward naturally and becomes the side wall of the beanie.
Pause after round 12 and measure from the top center to the working edge. Continue until the hat measures about 7½–8 in / 19–20 cm before the brim, or until it reaches the place you want the folded brim to begin. A shorter body produces a closer-fitting cap; a longer body leaves room for a slouchier fold or a deeper ear cover.
Common mistake: using the chain 2 as a stitch creates a slow increase at the join. If your seam begins to lean and your count rises to 61, undo to the beginning of the round and work the first hdc directly into the first real stitch.
Step 4: Check the crown shape before the brim
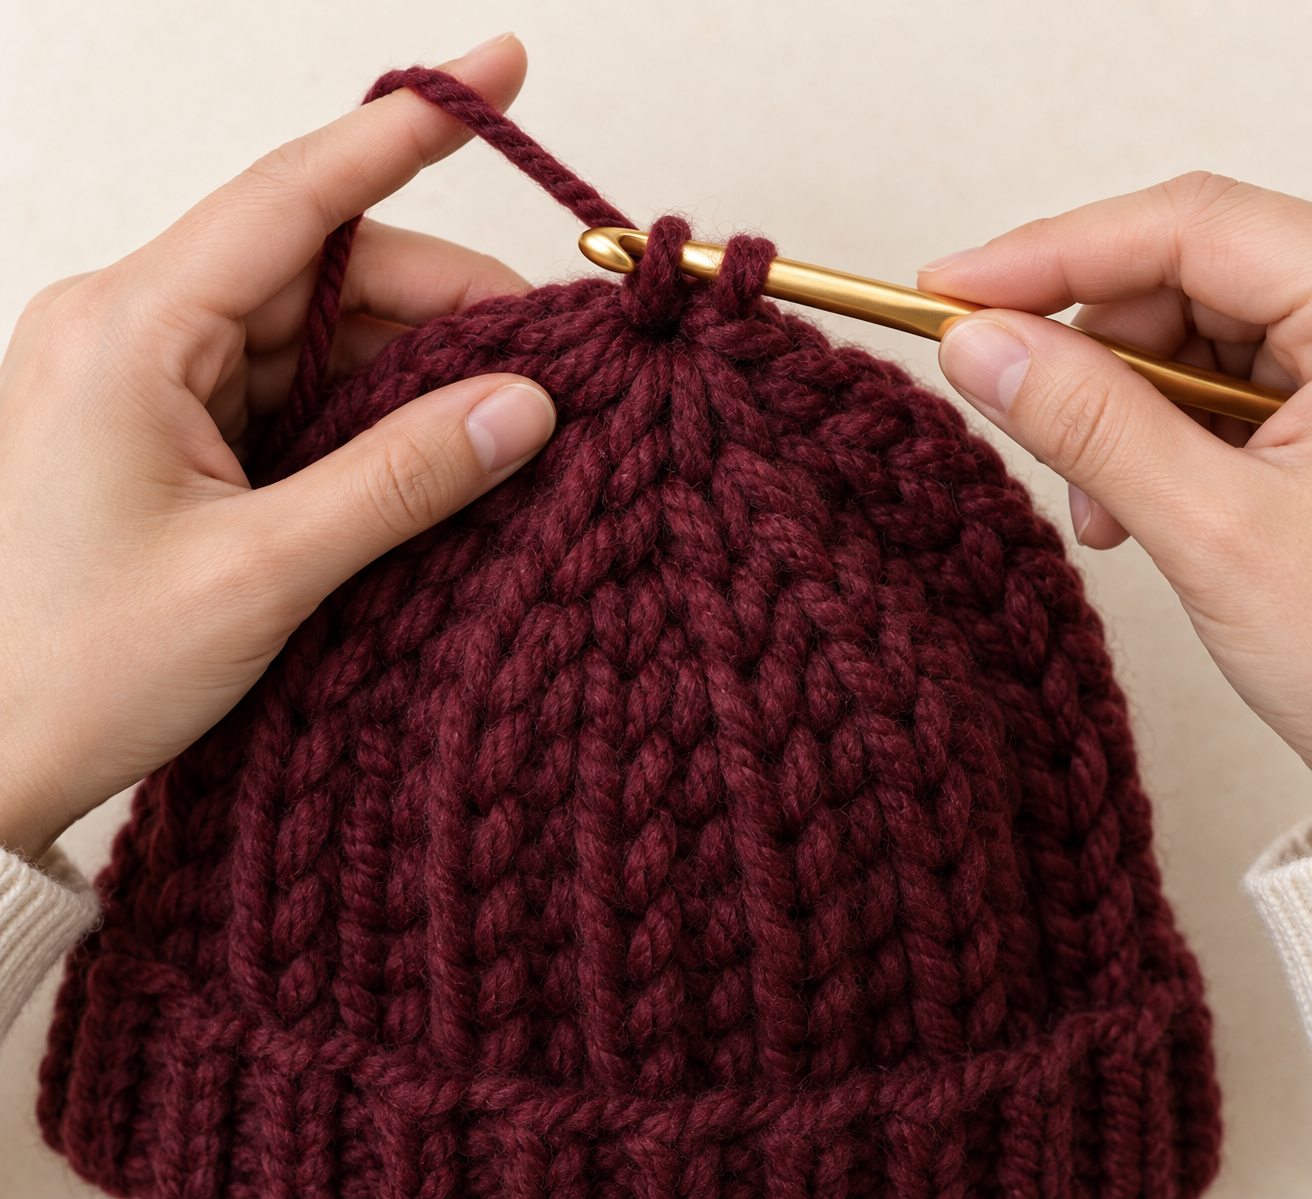
The shape of this beanie comes from the increase rounds at the beginning; there are no decreases in the written body. The close-up above is useful for reading the rounded crown and recognizing even stitch height as you work. If you want a more fitted top, stop the straight body when it reaches your chosen depth. If you prefer a little more room, add one or two straight hdc rounds before beginning the brim.
Try the unfinished hat on over your hair or place it over a soft form. It should settle around the head without pulling hard across the forehead. Crochet stretches with wear, so choose gentle comfort rather than a very loose fit. Do not rely only on an age or generic size label when making a wearable item for someone else.
Step 5: Work the folded brim
For rounds 19 through 23, chain 2 and work 1 hdc in the back loop only of every stitch. Join to the first real hdc each time. Back-loop-only work leaves a horizontal ridge on the outside of the fabric. Five rounds create a flexible band that can be folded upward to form the brim.
Do not pull the back loop upward as you insert the hook. Instead, tip the working edge slightly toward you, identify the two loops forming the top V, and use the loop farther away from you. Keep the first two or three brim stitches relaxed: a tight start can make the lower edge pinch even when the rest of the hat fits well.
After round 23, fold the last five rounds upward. The fold should sit naturally without sewing. If you want a taller cuff, add two more BLO rounds; if you prefer a shallow fold, stop after round 21 or 22. Make the adjustment evenly around the entire round rather than changing only one section.
Step 6: Fasten off and weave in the ends
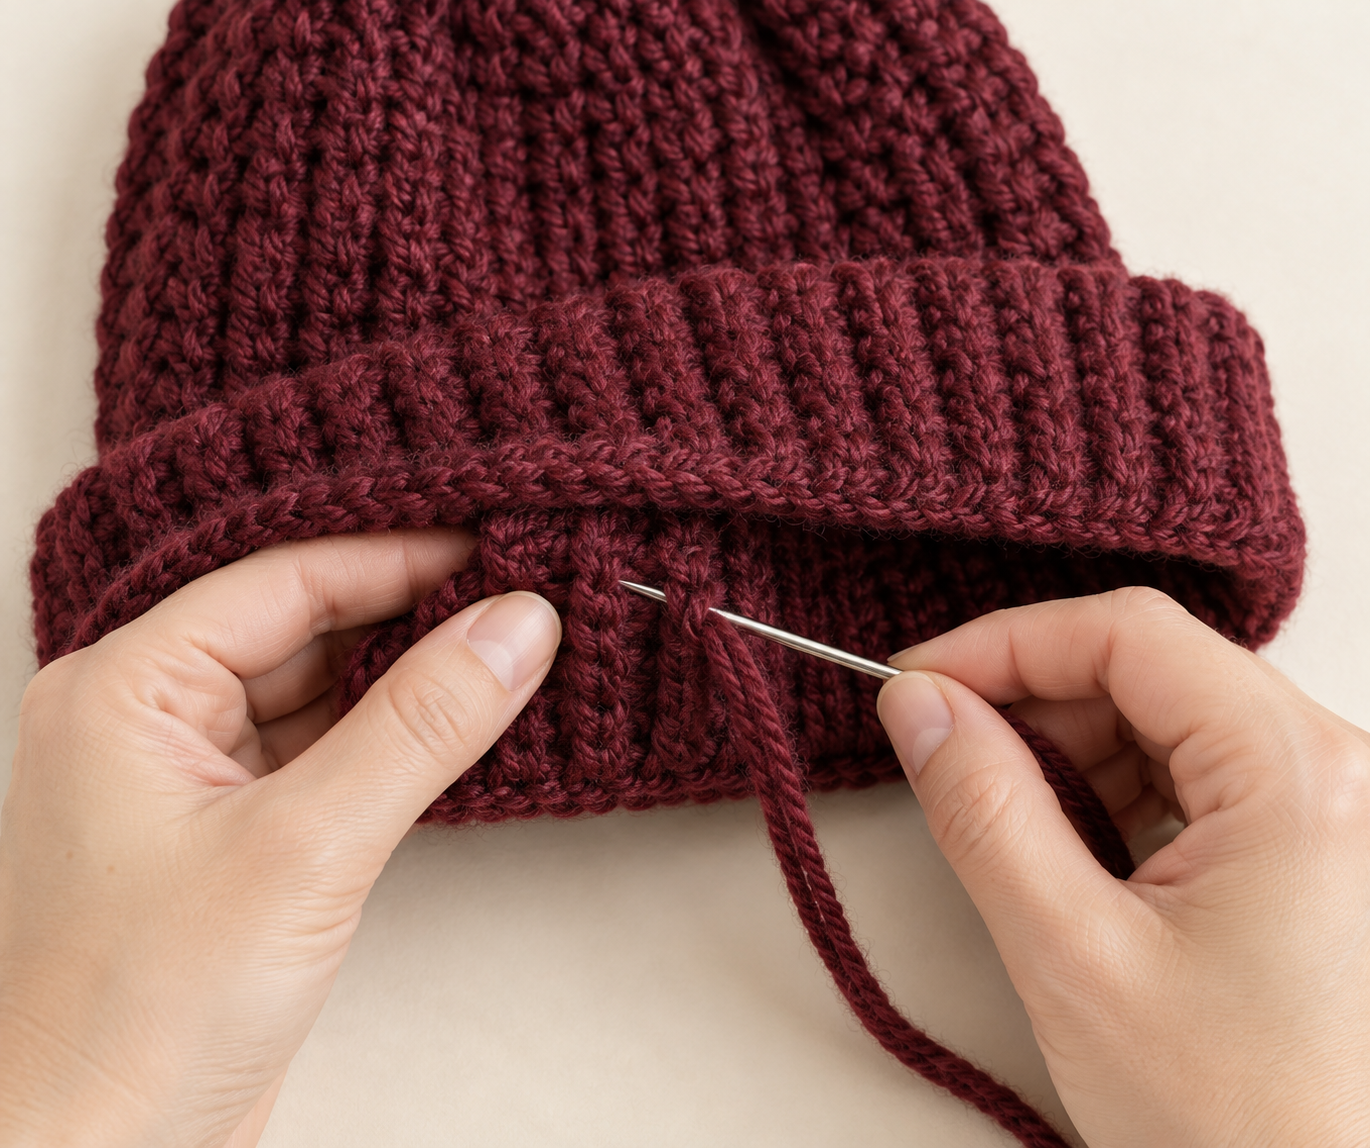
Cut the yarn, leaving a 5–6 in / 13–15 cm tail. Pull the tail through the final loop on your hook to fasten off. Thread it onto a blunt needle and weave through several wrong-side stitches in one direction. Change direction once, weave through a few more stitches, then trim the end close to the fabric. Weave the center tail through the dense crown in the same way.
Turn the hat inside out and run your fingers around the join and brim. There should be no loose tail, sharp-feeling needle path, or loop that can easily catch. Fold the brim up one final time and gently reshape the crown with your hands.
Technique Lab: small details that make the beanie look better
Read the top V, not the gap beside it
Each ordinary hdc has a V-shaped top. Insert under both loops of that V for the body rounds. A gap beside the V can look tempting, especially in bulky yarn, but working there leaves a distorted ridge. When you are unsure, trace the top of the previous stitch with your fingertip; the next V sits immediately beside it.
Control the height of your half double crochet
Before you pull through all three loops, let the working loop sit around the middle of the hook shaft. If it is very short, the fabric becomes stiff and the hat may lose comfortable stretch. If it is very tall, the rows become loose. Consistent loop height matters more than pulling each stitch as tightly as possible.
Make the joined-round seam quieter
Finish each round with a relaxed slip stitch into the first real hdc. Pulling that slip stitch tight makes a visible dimple; leaving it very loose creates a bump. Aim for the same height as the nearby stitch tops. The seam will still be visible on close inspection, but it should read as a neat vertical line rather than a stair-step.
Use the crown as a fit diagnostic
A crown that is flat but too small in diameter will make a narrow beanie even if the stitch count is correct. A crown that ripples may produce excess fabric at the temples. Check diameter while the crown is flat, then check circumference once the body has several rounds. This separates a shaping issue from a tension issue and makes corrections more deliberate.
Keep the folded brim elastic
The first BLO round is the foundation of the cuff. Keep your grip light and avoid yanking the back loop toward the hook. If the brim feels firmer than the body, go up one hook size for the BLO rounds only, then return to the original hook if you add more body. Test this change on a small swatch first so the ridge remains tidy.
Troubleshooting
My crown looks like a bowl. Recount the increase round first. If the count is correct, your tension may be tight; make the next attempt with a slightly larger hook or a looser working loop.
My crown has wavy edges. An extra increase is likely. Compare the number of plain hdc stitches between increase points with the table, then undo only to the first incorrect pair.
The hat is too narrow. Add another increase round before the straight body, using the same logic: increase, then 1 hdc in each of the next 5 stitches. This changes the circumference, so add enough straight rounds afterward to preserve depth.
The brim flares or rolls. Check that every brim stitch uses the back loop only and that you have not accidentally placed two hdc into one stitch. A very loose brim may benefit from returning to your original hook size.
Frequently asked questions
Can I use a different yarn weight?
Yes, but the stitch count and hook size will need adjustment. Make a swatch, measure its width, and use the crown measurement rather than expecting the written 60 stitches to fit in every yarn.
Can I make this beanie larger?
Yes. Add one evenly spaced increase round before the body, then add straight rounds for depth. Measure the crown as you go so the change remains intentional.
Is this pattern suitable for a complete beginner?
It is best for a beginner who already knows chains, a slip stitch, and half double crochet. The most important new skill is counting increase rounds accurately.
Why does my join look different from the rest of the fabric?
Joined rounds always create a subtle seam. Put your marker in the first real stitch, join gently, and make sure the chain 2 is not counted as a stitch.
How should I wash the finished beanie?
Follow the yarn label. Many wool blends prefer gentle hand washing and flat drying; many acrylic blends are machine washable. Reshape the folded brim while the hat is damp and allow it to dry away from direct heat.
Final thoughts
This beanie is more than a quick winter accessory: it is a practical way to learn how crochet increases create a crown, how straight rounds create depth, and how a simple loop change can form a finished brim. Keep your stitch-count table nearby, measure before you begin the brim, and save this guide for the next colour or size you make. Once the fit feels right, the same construction can become a matching scarf, a child-size hat, or a softer slouchy version.
More in Crochet Projects & Patterns
How to Crochet a Gift Card Holder: An Easy Handmade Gift for Beginners
How to Crochet a Reusable Gift Bow: Easy Christmas Package Topper
How to Crochet a Flower Bookmark: An Easy Handmade Gift for Beginners